Here we explain how you can customize your hosted onboarding page for your users. You can:
- Create a hosted onboarding theme
- Change the language of the hosted onboarding page
- Change the user settings for the page
- View your hosted onboarding themes
- Update a theme
You can also test instant bank verification to ensure the process works correctly before sharing the hosted onboarding page with your users.
Create a hosted onboarding theme
You can customize the appearance of your hosted onboarding page by creating a theme. For the best user experience, we recommend the following when you create your theme:
- Incorporate your logo to highlight your brand identity.
- Use a clear and meaningful page header.
- Include a descriptive tab title and a favicon to make the page tab visible in the browser.
- Add a redirectUrl that takes the user back to your platform after completing the hosted onboarding.
- When choosing color combinations, ensure they complement each other well and provide enough contrast for readability, especially for text and navigation elements. Consider accessibility guidelines to ensure the color palette is inclusive and usable for individuals with visual impairments.
Remember that you must have the following user roles to create or edit themes:- Manage hosted onboarding themes- Balance platform admin role or Balance platform base role
To add a new theme:
-
Log in to your Customer Area.
-
In the navigation menu, select the company account.
-
Select Settings > Hosted onboarding.
-
Select Add new from the drop-down menu.
-
Add an optional description to identify the theme. If you do not add a description, the theme ID is shown in the drop-down menu list.
-
Customize the browser tab:
- Add a tab title of up to 60 characters.
- Upload a favicon of a 1:1 ratio.
-
Customize the appearance of your page:
- Upload your brand logo. The file size limit for a logo is 5 MB in JPG format.
- Specify your page header.
- Select a background for your page. You can choose either:
- A background color using a hex color code.
- A background image. The file size limit for an image is 5 MB in PDF or JPG format.
-
Add the external links to appear on your hosted onboarding page. We recommend you use the following:
Page name URL Support Your own support page Privacy statement Adyen privacy policy F.A.Q. Hosted onboarding FAQs -
Select Save to confirm the theme configurations.
-
Copy a unique ID of your theme. You need to pass this ID when making a POST /legalEntities/{id}/onboardingLinks request to create a hosted onboarding link.
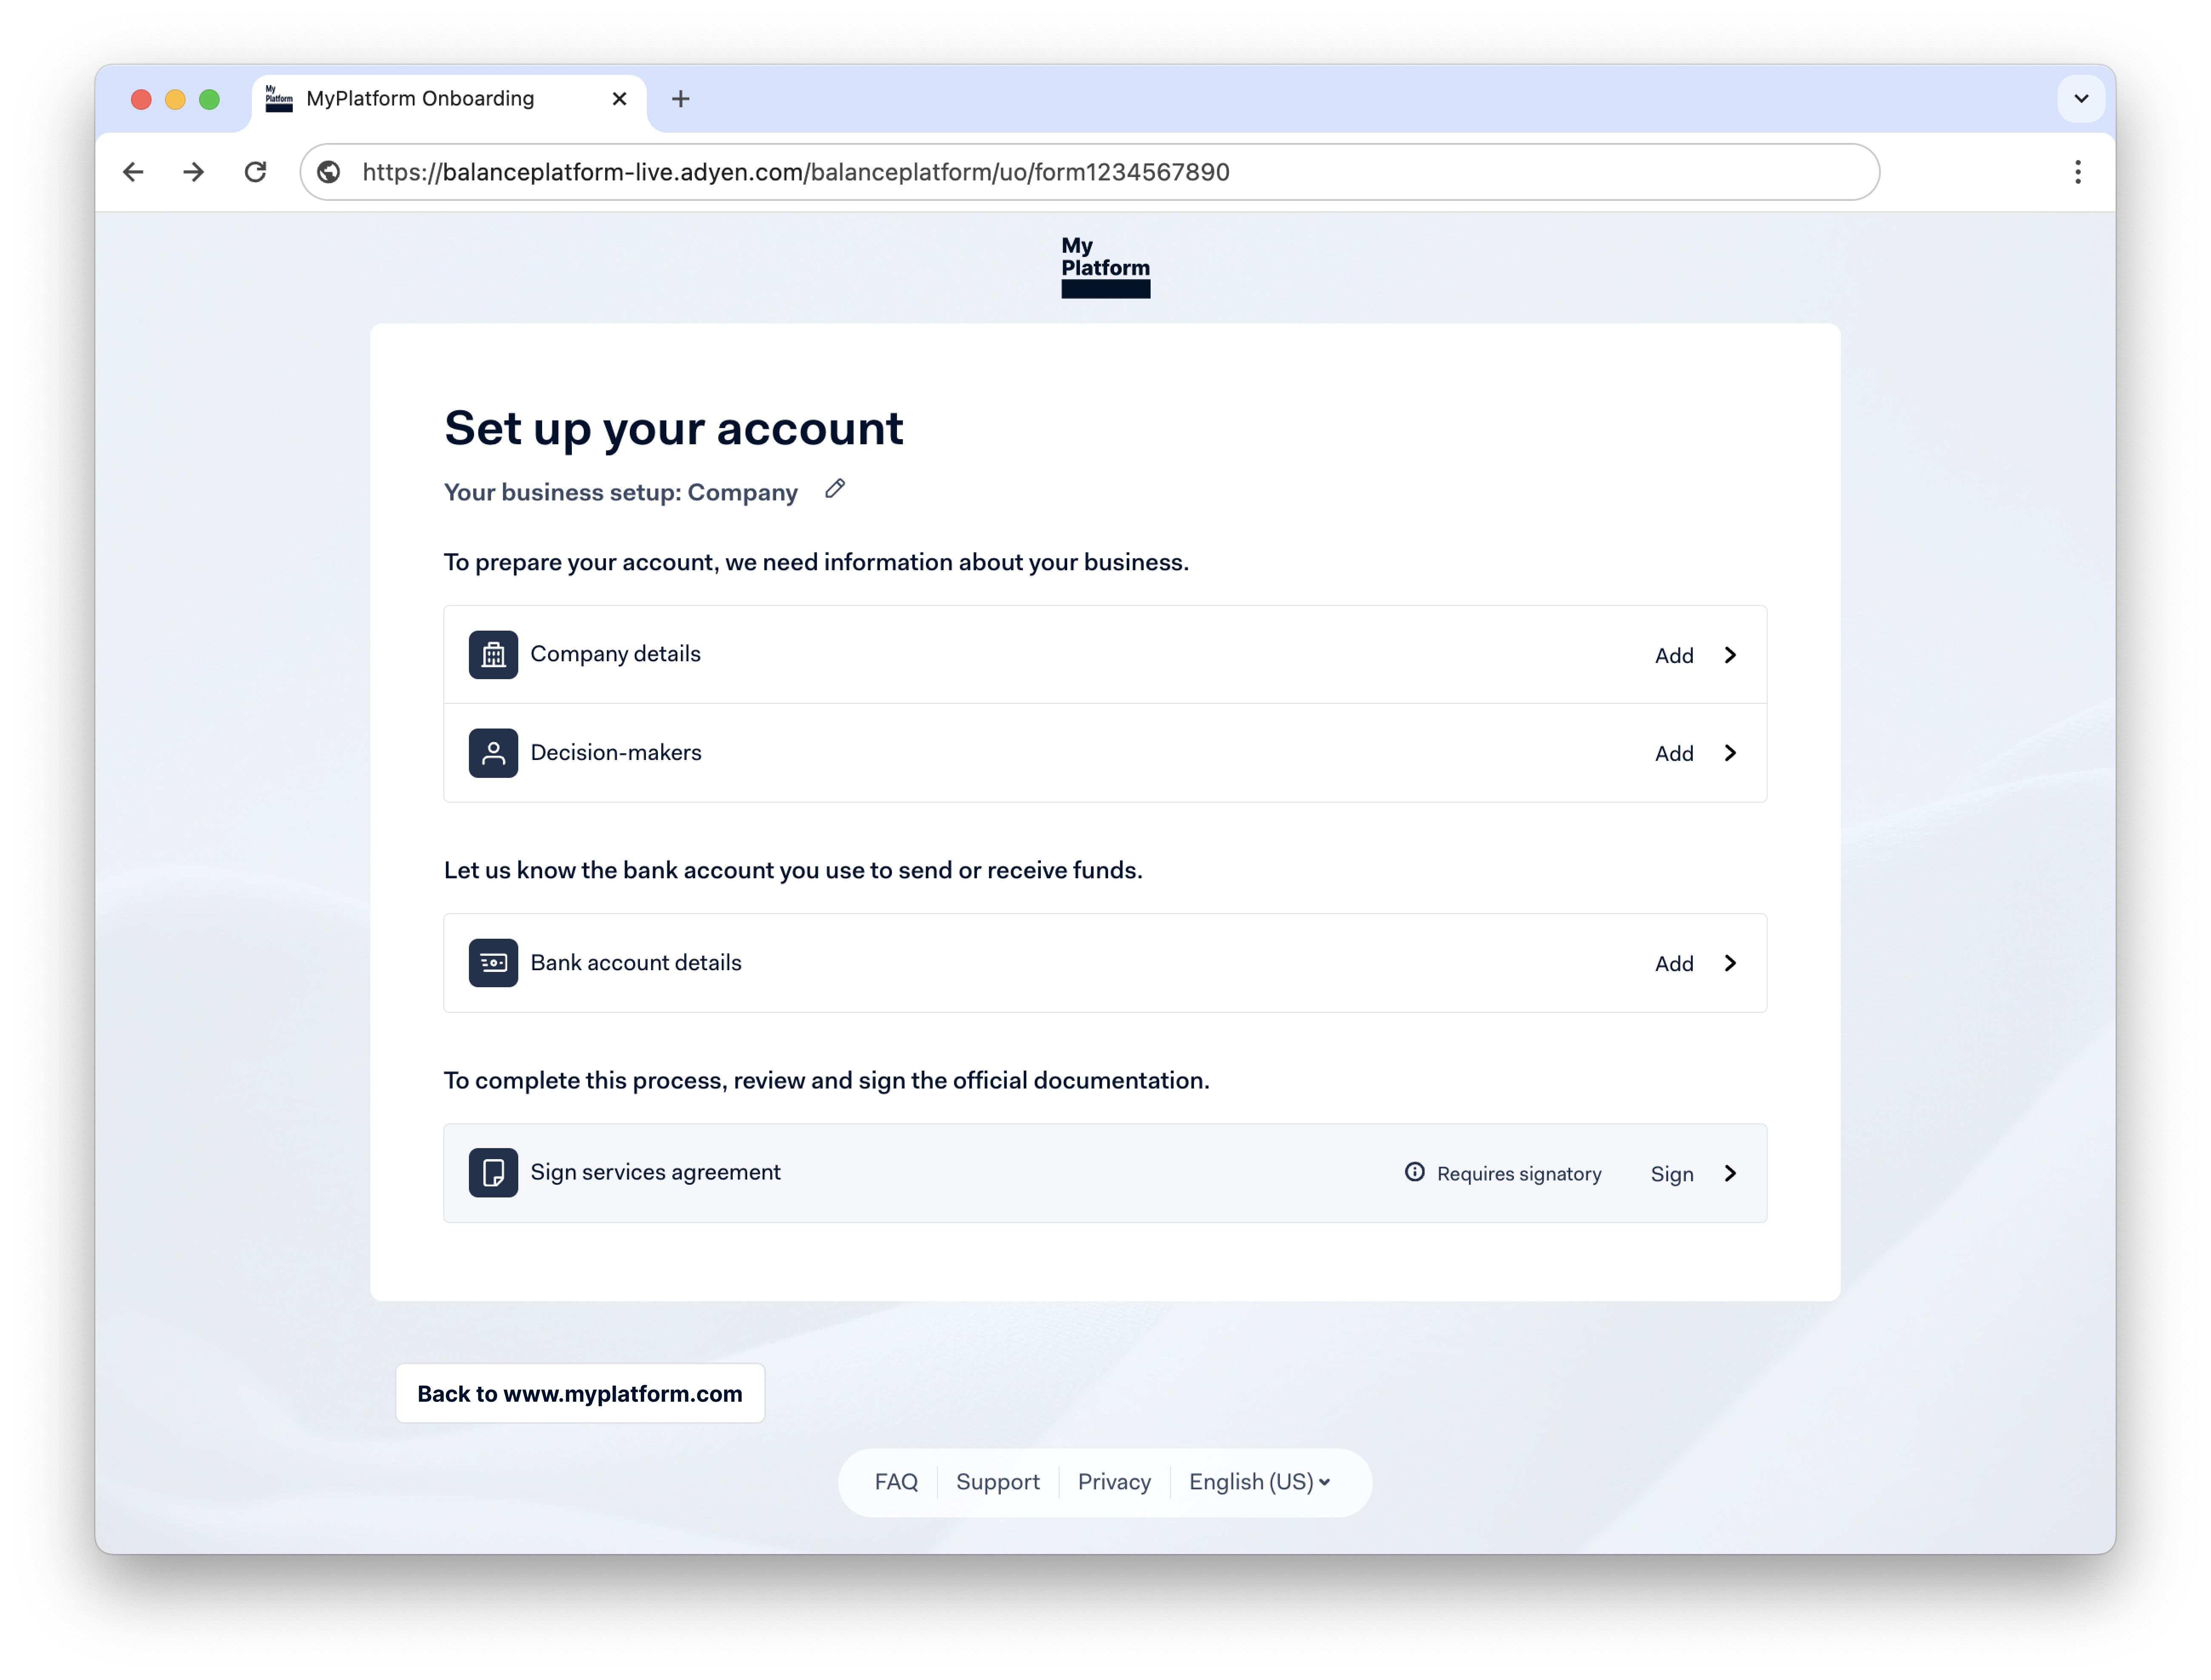
To get an idea of how your hosted onboarding page could look, refer to the examples below.

Change the page language
By default, the hosted onboarding page is rendered in the language set in the browser settings. If the browser language is not supported, the page is rendered in en-US. You can change the language of the page by specifying the locale in your /legalEntities/{id}/onboardingLinks request.
The values for locale are a combination of the two letter ISO 639-1 language and ISO 3166-1 alpha-2 country codes. If an unsupported locale value is sent in the request, the page is rendered in the next available value for a given language. For example, if en-GB is sent, the page defaults to en-US.
The following languages are currently supported.
| Language | Locale |
|---|---|
| Bulgarian | bg-BG |
| Croatian | hr-HR |
| Czech | cs-CZ |
| Danish | da-DK |
| Dutch | nl-NL |
| English | en-US |
| Estonian | et-EE |
| Finnish | fi-FI |
| French | fr-FR |
| German | de-DE |
| Greek | el-GR |
| Hungarian | hu-HU |
| Italian | it-IT |
| Latvian | lv-LV |
| Lithuanian | lt-LT |
| Norwegian | no-NO |
| Polish | pl-PL |
| Portuguese | pt-PT |
| Romanian | ro-RO |
| Slovak | sk-SK |
| Slovenian | sl-SI |
| Spanish | es-ES |
| Swedish | sv-SE |
Change page settings
You can control particular actions that your user performs in the hosted onboarding page by specifying the settings in your /legalEntities/{id}/onboardingLinks request.
The settings object contains key-value pairs, where the key represents a specific setting.
| Setting | Type | Default value | Description | |
|---|---|---|---|---|
acceptedCountries |
array of strings | The list of countries the user can choose from in hosted onboarding when editPrefilledCountry is allowed.The value must be in the two-character ISO 3166-1 alpha-2 country code format.The array is empty by default, allowing all countries and regions supported by hosted onboarding. |
||
allowBankAccountFormatSelection |
boolean | false | The user can select the format for their payout account if applicable.Set this to true to allow the action. | |
allowIntraRegionCrossBorderPayout |
boolean | false | The user can select a payout account in a different EU/EEA location (including Switzerland and the UK) than the location of their legal entity.Set this to true to allow the action. | |
changeLegalEntityType |
boolean | true | The user can change their legal entity type.Set this to false to not allow the action. | |
editPrefilledCountry |
boolean | true | The user can change the country of their legal entity's address, for example the registered address of an organization.Set this to false to not allow the action. | |
hideOnboardingIntroductionIndividual |
boolean | false | The user with an individual legal entity type can view the introduction screen.The introduction screen provides brief instructions for the subsequent steps in the hosted onboarding process.Set this to true to allow the action. | |
hideOnboardingIntroductionOrganization |
boolean | false | The user with an organization legal entity type can view the introduction screen.The introduction screen provides brief instructions for the subsequent steps in the hosted onboarding process.Set this to true to allow the action. | |
instantBankVerification |
boolean | true | The user can initiate the verification process through open banking providers, like Plaid or Tink.Set this to false to not allow the action. | |
transferInstrumentLimit |
integer | The maximum number of transfer instruments the user can create. |
View hosted onboarding themes
You can view your hosted onboarding themes and assets in your Customer Area or by making API requests using the Legal Entity Management API.
To view the themes in your Customer Area:
- In the navigation menu, select the merchant account linked to your balance platform.
- Go to Settings > Hosted onboarding.
- Select a theme from the dropdown menu.
Update a hosted onboarding theme
To update a theme in your Customer Area:
- In the navigation menu, select the merchant account linked to your balance platform.
- Go to Platforms > Settings > Hosted onboarding.
- Select a theme from the dropdown menu.
- Make your changes and select Save.
Test instant bank verification
To test the instant bank verification flow:
- In your test environment, select the test account for your specified country/region.
- Enter the corresponding user name and password from the table below.
| Country/region | Test account | User name | Password |
|---|---|---|---|
| Canada | Demo Bank | asd | asd |
| Belgium | Tink Demo Bank | u51613239 | cty440 |
| Denmark | Tink Demo Bank | u51613239 | cty440 |
| Estonia | Tink Demo Bank | u91902655 | jtx720 |
| Finland | Tink Demo Bank | u80628915 | puv375 |
| France | Tink Demo Bank | u98563939 | ene512 |
| Germany | Tink Demo Bank | u98235448 | cdz248 |
| Italy | Tink Demo Bank | u51613239 | cty440 |
| Latvia | Tink Demo Bank | u91902655 | jtx720 |
| Lithuania | Tink Demo Bank | u91902655 | jtx720 |
| Netherlands | Tink Demo Bank | u48874162 | idz429 |
| Norway | Tink Demo Bank | u26049657 | mip544 |
| Poland | Tink Demo Bank | u51613239 | cty440 |
| Portugal | Tink Demo Bank | u51613239 | cty440 |
| Spain | Tink Demo Bank | u82144157 | ymm529 |
| Sweden | Tink Demo Bank | u27678322 | vrh343 |
| United Kingdom | Tink Demo Bank | u30315772 | ndg370 |
| United States | Demo Bank | asd | asd |