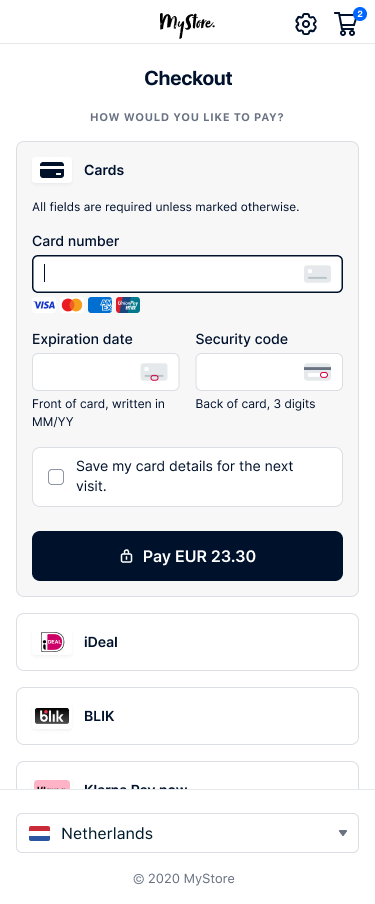
iOS Components
Render individual payment methods anywhere in your app.
Supported payment methods
Cards, buy now pay later, wallets, and many more.
See all supported payment methods
Features
- Low development time to integrate each payment method component
- UI styling customization for each payment method
- Flexibility to add payment method components with configuration for each
- 3D Secure 2 support using the 3D Secure 2 Component
Start integrating with iOS Components
Choose your versionComponents are our pre-built UI solution for accepting payments in your app. Each Component renders a payment method you can render anywhere in your app. For the Advanced flow, your server makes API requests to the /paymentMethods, /payments, and /payments/details endpoints.
Requirements
Before you begin to integrate, make sure you have followed the Get started with Adyen guide to:
- Get an overview of the steps needed to accept live payments.
- Create your test account.
After you have created your test account:
- Get your API key.
- Get your client key.
- Set up webhooks to know the payment outcome.
Install the Adyen iOS client-side library
Choose how you want to install the Adyen iOS client-side library:
To install iOS Components using Swift Package Manager, follow the Apple guide and specify:
- The repository URL as
https://github.com/Adyen/adyen-ios - The version to be at least 3.8.0
Get your client key
You need a client key, a public key linked to your API credential, that the iOS Components use for client-side authentication.
- Log in to your Customer Area.
- Go to Developers > API credentials, and select the API credential for your integration, for example ws@Company.[YourCompanyAccount].
- Under Authentication, select Generate New Client Key.
- Select Save.
How it works
For a Components integration, you must implement the following parts:
The parts of your integration work together to complete the payment flow:
- From your server, submit a request to get a list of payment methods available to the shopper.
- Add Components to your payments form.
- From your server, submit a payment request with the data returned by the Component.
- Determine from the response if you need to perform additional actions on your client app, such as to redirect the shopper.
- From your server, verify the payment result.
- Get the payment outcome.
If you are integrating these parts separately, you can start at the corresponding part of this integration guide:


Install an API library
We provide server-side API libraries for several programming languages, available through common package managers, like Gradle and npm, for easier installation and version management. Our API libraries will save you development time, because they:
- Use an API version that is up to date.
- Have generated models to help you construct requests.
- Send the request to Adyen using their built-in HTTP client, so you do not have to create your own.
Try our example integration
Requirements
- Java 11 or later.
Installation
You can use Maven, adding this dependency to your project's POM.
<dependency> <groupId>com.adyen</groupId> <artifactId>adyen-java-api-library</artifactId> <version>LATEST_VERSION</version> </dependency>
You can find the latest version on GitHub. Alternatively, you can download the release on GitHub.
Setting up the client
Create a singleton resource that you use for the API requests to Adyen:
// Import the required classes. package com.adyen.service; import com.adyen.Client; import com.adyen.service.checkout.PaymentsApi; import com.adyen.model.checkout.Amount; import com.adyen.enums.Environment; import com.adyen.service.exception.ApiException; import java.io.IOException; public class Snippet { public Snippet() throws IOException, ApiException { // Set up the client and service. Client client = new Client("ADYEN_API_KEY", Environment.TEST); } }
Get available payment methods
When your shopper is ready to pay, get a list of the available payment methods based on their country, device, and the payment amount.
From your server, make a POST /paymentMethods request, providing the following parameters. While most parameters are optional, we recommend that you include them because Adyen uses these to tailor the list of payment methods for your shopper.
We use the optional parameters to tailor the list of available payment methods to your shopper.
| Parameter name | Required | Description |
|---|---|---|
merchantAccount |
 |
Your merchant account name. |
amount |
The currency of the payment and its value in minor units. |
|
channel |
The platform where the payment is taking place. Use iOS. Adyen returns only the payment methods available for iOS. | |
countryCode |
The shopper's country/region. Adyen returns only the payment methods available in this country. Format: the two-letter ISO-3166-1 alpha-2 country code. Exception: QZ (Kosovo). |
|
shopperLocale |
Language and country code. By default, the shopper locale is set to en-US. If this is provided, the payment method names are translated to the specified language. |
The following example shows how to get the available payment methods for a shopper in the Netherlands, for a payment of EUR 10:
curl https://checkout-test.adyen.com/checkout/v70/paymentMethods \ -H 'x-api-key: ADYEN_API_KEY' \ -H 'content-type: application/json' \ -d '{ "merchantAccount": "ADYEN_MERCHANT_ACCOUNT", "countryCode": "NL", "amount": { "currency": "EUR", "value": 1000 }, "channel": "Android", "shopperLocale": "nl-NL" }'
The response includes the list of available paymentMethods:
{ "paymentMethods":[ { "details":[...], "name":"Cards", "type":"scheme" ... }, { "details":[...], "name":"SEPA Direct Debit", "type":"sepadirectdebit" }, ... ] }
Pass the response to your client app. You then use this in the next step to present which payment methods are available to the shopper.
Add Components to your payment form
Use the Component to collect payment details from your shopper.
-
Decode the /paymentMethods response with the
PaymentMethodsstructure. Find the payment method object for the Component that you want to instantiate. For example, for a card payment, you need to find theCardPaymentMethodobject.Decode the payment methods responseExpand viewCopy link to code blockCopy codelet paymentMethods = try JSONDecoder().decode(PaymentMethods.self, from: paymentMethodsResponse)Get the payment method from the payment methods object. For example, the card payment method:
Get the payment methodExpand viewCopy link to code blockCopy codelet cardPaymentMethod = paymentMethods.paymentMethod(ofType: CardPaymentMethod.self)
-
Create an instance of
APIContextthat contains to following:Description Client key Authenticates requests from your payment environment. Environment setting The environment value that matches the endpoint that your server uses. Use Environment.test for your test environment. Create the APIContextExpand viewCopy link to code blockCopy code// Set the client key and environment in an instance of APIContext. let apiContext = APIContext(clientKey: clientKey, environment: Environment.test) // Set the environment to a live one when going live.
-
Create an instance of
AdyenContextthat contains the following:Description API context Your instance of APIContext.Payment information A Paymentobject with the payment amount and currency.Create the AdyenContextExpand viewCopy link to code blockCopy code// Create the amount with the value in minor units and the currency code. let amount = Amount(value: 1000, currencyCode: "EUR") // Create the payment object with the amount and country code. let payment = Payment(amount: amount, countryCode: "NL") // Create an instance of AdyenContext, passing the instance of APIContext, and payment object. let adyenContext = AdyenContext(apiContext: apiContext, payment: payment)
-
Create a configuration object. You can add the following:
Type of configuration Description Payment method configuration Some payment methods require additional configuration or have optional configuration. Optional configuration You can add optional configuration to each component. The following example shows creating a configuration object for the Card Component.
Configure the ComponentExpand viewCopy link to code blockCopy codelet cardConfiguration = CardComponent.Configuration() // Some payment methods have additional required or optional configuration. // For example, an optional configuration to show the cardholder name field for cards. cardConfiguration.showsHolderNameField = true
-
Initialize the Component class.
Parameter name Required Description paymentMethodThe full, decoded /paymentMethods response. contextThe AdyenContextthat you created.configurationThe configuration object that you created. The following example shows initializing an instance of
CardComponent.Initialize the ComponentExpand viewCopy link to code blockCopy codelet cardComponent = CardComponent(paymentMethod: cardPaymentMethod, context: adyenContext, configuration: cardConfiguration) // Keep the instance of the Component so that it doesn't get destroyed after the function is executed. self.cardComponent = cardComponent // Set self as the delegate. cardComponent.delegate = self -
Get the contents of
data.paymentMethodand pass this to your server. Dismiss the Component immediately, or wait until you have submitted the details to your server.didSubmit with payment method dataExpand viewCopy link to code blockCopy codefunc didSubmit(_ data: PaymentComponentData, from component: PaymentComponent)In case an error occurs on the app, the Component invokes the
didFailmethod from thePaymentComponentDelegate. Dismiss the Component's view controller and display an error message.didFail with an errorExpand viewCopy link to code blockCopy codefunc didFail(with error: Error, from component: PaymentComponent)
Make a payment
After the shopper submits their payment details or chooses to pay with a payment method that requires a redirection, you need to make a payment request to Adyen.
From your server, make a POST /payments request specifying:
| Parameter name | Required | Description |
|---|---|---|
merchantAccount |
|
Your merchant account name. |
amount |
|
The currency of the payment and its value in minor units. |
reference |
|
Your unique reference for this payment. |
paymentMethod |
|
The data.paymentMethod from the didSubmit method from your client app. |
returnUrl |
|
The URL the shopper should be taken back to after a redirection. Use the custom URL for your app, for example, my-app://adyen, to take the shopper back to your app after they complete the payment outside of your app. For more information on setting a custom URL scheme, read the Apple Developer documentation. The URL can contain a maximum of 1024 characters. You can also include your own additional query parameters, for example, shopper ID or order reference number. If the URL to return to includes non-ASCII characters, like spaces or special letters, URL encode the value. The URL must not include personally identifiable information (PII), for example name or email address. |
applicationInfo
|
If you are building an Adyen solution for multiple merchants, include some basic identifying information, so that we can offer you better support. For more information, refer to Building Adyen solutions. |
You need to include additional parameters in your payment request to:
- Integrate some payment methods. For more information, refer to our payment method integration guides.
- Make use of our risk management features. For more information, see Required risk fields.
- Use native 3D Secure 2 authentication.
- Tokenize your shopper's payment details or make recurring payments.
The following example shows how to make a payment request for EUR 10:
curl https://checkout-test.adyen.com/checkout/v70/payments \ -H 'x-api-key: ADYEN_API_KEY' \ -H 'content-type: application/json' \ -d '{ "amount":{ "currency":"EUR", "value":1000 }, "reference":"YOUR_ORDER_NUMBER", "paymentMethod":STATE_DATApaymentMethod field of an object passed from your client app, "returnUrl":"my-app://adyen", "merchantAccount":"ADYEN_MERCHANT_ACCOUNT" }'
Your next steps depend on whether the /payments response contains an action object:
| Description | Next steps | |
|---|---|---|
No action object |
No additional steps are needed to complete the payment. | 1. Dismiss the Component. 2. Get the payment outcome. |
With action object |
The shopper needs to do additional actions to complete the payment. | 1. Pass the action object to your client app. Make sure that you only pass the action object and not the full response. 2. Handle the additional action. |
The following example shows a /payments response with action.type: threeDS2:
{ "resultCode" : "IdentifyShopper", "action" : { "token" : "eyJkaXJl...", "paymentMethodType" : "scheme", "paymentData" : "Ab02b4c0...", "type" : "threeDS2", "authorisationToken" : "BQABAQ...", "subtype" : "fingerprint" } }
Handle the additional action
Some payment methods require additional action from the shopper such as: to authenticate a payment with 3D Secure, or to switch to another app to complete the payment.
To handle these additional client app actions, the Component uses the action object from the previous step. You should also use the action.type to determine your next steps.
-
Use AdyenActionComponent to perform any actions.
Create and persist instance of
AdyenActionComponent:AdyenActionComponentExpand viewCopy link to code blockCopy codeinternal lazy var actionComponent: AdyenActionComponent = { let component = AdyenActionComponent(apiContext: apiContext) component.delegate = self component.presentationDelegate = self return component }() Then use it to handle the action:
Handle the actionExpand viewCopy link to code blockCopy codelet action = try JSONDecoder().decode(Action.self, from: actionData) actionComponent.handle(action) -
AdyenActionComponentperforms additional client app actions depending on theaction.type. Your next steps depend on the type of action that it performs.action.typeDescription Next steps redirect AdyenActionComponent redirects the shopper to another website or app to complete the payment.
When the shopper is redirected back to your app, AdyenActionComponent calls the delegate'sdidProvidemethod.1. Get the datafrom thedidProvidemethod and pass it to your server. Dismiss current component immediately, or wait until you have submitted the details to your server.
2. When the shopper returns to your app, handle the redirect result.
3. Submit additional payment details to check the payment result.threeDS2 The payment qualifies for 3D Secure 2, and will go through either the frictionless or the challenge flow.
AdyenActionComponent performs the authentication flow, and calls thedidProvidemethod.1. Get the datafrom thedidProvidemethod and pass it to your server. Dismiss current component immediately, or wait until you have submitted the details to your server.
2. Submit additional payment details.sdk AdyenActionComponent triggers the app switch from your app to the payment method's app, if installed in the shopper's device.
When the shopper is redirected back to your app, AdyenActionComponent calls thedidProvidemethod.1. Get the datafrom thedidProvidemethod and pass it to your server. Dismiss current component immediately, or wait until you have submitted the details to your server.
2. Submit additional payment details to check the payment result.voucher AdyenActionComponent uses presentationDelegateto present UI for voucher. The shopper expected to shared, save voucher as image or, in some cases, add voucher to AppleWallet.
When shopper finishes the flow, AdyenActionComponent callsdidCompleteDismiss current component immediately. Payment flow is completed. await AdyenActionComponent uses presentationDelegateto present await UI. The shopper expected to continue payment process outside of the merchant's app.
AdyenActionComponent will poll payment status and, if completed, calls thedidProvidemethod.1. Get the datafrom thedidProvidemethod and pass it to your server. Dismiss current component immediately, or wait until you have submitted the details to your server.
2. Submit additional payment details.qrcode AdyenActionComponent uses presentationDelegateto present UI for QR code payment. The shopper expected to continue payment process outside of the merchant's app.
AdyenActionComponent will poll payment status and, if completed, calls thedidProvidemethod.1. Get the datafrom thedidProvidemethod and pass it to your server. Dismiss current component immediately, or wait until you have submitted the details to your server.
2. Submit additional payment details.
Redirect Component
If the action.type is redirect, initialize the Redirect Component.
-
Make sure that you inform the
AdyenActionComponentwhen the shopper returns to your app. To do this, implement the following in yourUIApplicationDelegate:func application(_ app: UIApplication, open url: URL, options: [UIApplicationOpenURLOptionsKey: Any] = [:]) -> Bool { RedirectComponent.applicationDidOpen(from: url) return true } -
After the Redirect Component under the hood of
AdyenActionComponentcompletes the additional action, the Component invokes thedidProvidemethod from theActionComponentDelegate. Get the contents ofdataand pass this to your server. Dismiss the Component immediately, or wait until you have submitted the details to your server.didProvide with action dataExpand viewCopy link to code blockCopy codefunc didProvide(_ data: ActionComponentData, from component: ActionComponent)In case an error occurs on the app, the Component invokes the
didFailmethod from theActionComponentDelegate. Dismiss the Component's view controller and display an error message.
Send additional payment details
If the shopper performed additional action to complete the payment, you need to make another request to Adyen to either submit the additional payment details or to check the payment result.
From your server, make a POST /payments/details request with the data from the didProvide method from your client app:
func didProvide(_ data: ActionComponentData, from component: ActionComponent)curl https://checkout-test.adyen.com/checkout/v70/payments/details \ -H 'x-api-key: ADYEN_API_KEY' \ -H 'content-type: application/json' \ -d 'STATE_DATAobject passed from your client app'
Your next steps depend on whether the /payments/details response contains an action object:
| Description | Next steps | |
|---|---|---|
no action object |
No additional steps are needed to complete the payment. This is always the case for Checkout v67 and later. |
Get the payment outcome. |
action object |
The shopper needs to do additional actions to complete the payment. | 1. Pass the action object to your client app. 3. Perform step 4 again. |
{ "pspReference": "KHQC5N7G84BLNK43", "resultCode": "Authorised" }
{ "pspReference": "NC6HT9CRT65ZGN82", "refusalReason": "Not enough balance", "resultCode": "Refused" }
Dismiss the Component
After you make a /payments, or /payments/details request and submit the payment data and/or additional details, dismiss the Component to finalize the payment flow.
Call finalizeIfNeeded and do the following, depending on what the Component handled:
| What to do | |
|---|---|
| Result code | If no further steps are required from the application, dismiss the Component. |
| Error | Dismiss the Component, and show an error message. |
Implement the following in your currentComponent object:
currentComponent?.finalizeIfNeeded(with: isSuccessful) { [weak self] in guard let self else { return } myCheckoutViewController.dismiss(animated: true) { [weak self] in // Continue the flow. } }
Get the payment outcome
After the Component finishes the payment flow, you can show the shopper the current payment status. Adyen sends a webhook with the outcome of the payment.
Inform the shopper
Use the
resultCode
to show the shopper the current payment status. This synchronous response doesn't give you the final outcome of the payment. You get the final payment status in a webhook that you use to update your order management system.
Update your order management system
You get the outcome of each payment asynchronously, in an AUTHORISATION webhook. Use the merchantReference from the webhook to match it to your order reference.
For a successful payment, the event contains success: true.
{ "live": "false", "notificationItems":[ { "NotificationRequestItem":{ "eventCode":"AUTHORISATION", "merchantAccountCode":"YOUR_MERCHANT_ACCOUNT", "reason":"033899:1111:03/2030", "amount":{ "currency":"EUR", "value":2500 }, "operations":["CANCEL","CAPTURE","REFUND"], "success":"true", "paymentMethod":"mc", "additionalData":{ "expiryDate":"03/2030", "authCode":"033899", "cardBin":"411111", "cardSummary":"1111" }, "merchantReference":"YOUR_REFERENCE", "pspReference":"NC6HT9CRT65ZGN82", "eventDate":"2021-09-13T14:10:22+02:00" } } ] }
For an unsuccessful payment, you get success: false, and the reason field has details about why the payment was unsuccessful.
{ "live": "false", "notificationItems":[ { "NotificationRequestItem":{ "eventCode":"AUTHORISATION", "merchantAccountCode":"YOUR_MERCHANT_ACCOUNT", "reason":"validation 101 Invalid card number", "amount":{ "currency":"EUR", "value":2500 }, "success":"false", "paymentMethod":"unknowncard", "additionalData":{ "expiryDate":"03/2030", "cardBin":"411111", "cardSummary":"1112" }, "merchantReference":"YOUR_REFERENCE", "pspReference":"KHQC5N7G84BLNK43", "eventDate":"2021-09-13T14:14:05+02:00" } } ] }
Test and go live
Before going live, use our list of test cards and other payment methods to test your integration. We recommend testing each payment method that you intend to offer to your shoppers.
You can check the status of a test payment in your Customer Area, under Transactions > Payments.
To debug or troubleshoot test payments, you can also use API logs in your test environment.
When you are ready to go live, you need to:
- Apply for a live account.
- Assess your PCI DSS compliance, and submit the Self-Assessment Questionnaire-A.
- Configure your live account.
- Switch from test to our live endpoints.
-
Load the Components from one of our live environments and set the Component's
environmentto match your live endpoints:Endpoint region environmentvalueEurope liveEurope Australia liveAustralia US liveUnitedStates Asia Pacific and South East liveApse
Error handling
In case you encounter errors in your integration, refer to the following:
- API error codes: If you receive a non-HTTP 200 response, use the
errorCodeto troubleshoot and modify your request. - Payment refusals: If you receive an HTTP 200 response with an Error or Refused
resultCode, check the refusal reason and, if possible, modify your request.
Optional configuration
You can set additional configuration on the Component configuration.
| Parameter name | Description |
|---|---|
showsSubmitButton |
Set to false to hide the default pay button, so that you can implement a custom button instead. Default: true. |
shopperInformation |
Prefilled shopper information. |
localizationParameters |
Localization parameters, like custom placeholders in other languages. |
style |
Custom styling of the UI. |
The following example shows how to set optional configuration parameters on the Card Component.
// Create a configuration object for the Component. let cardComponentConfiguration = CardComponent.Configuration() // Optional: create a configuration object for styling. let style = FormComponentStyle() // Set the background color. style.backgroundColor = .darkGray // Set the style on the configuration object. cardComponentConfiguration.style = style
Implement a custom pay button
To implement a custom pay button, hide the default one and use the included functions to validate and submit payment data.
This is not supported for Apple Pay and BACS Direct Debit.
- When you create the configuration object, set
showsSubmitButtonto false. - Initialize the Component.
- You can optionally show a confirmation page to the shopper, where payment data is validated.
- Create and show your custom button.
You can use the following functions.
| Function | Required | Description |
|---|---|---|
validate() |
Validates the payment data. | |
submit() |
|
Makes a /payments request to submit the payment data. |
The following example shows the Card Component with a custom pay button.
class CardPaymentViewController: UIViewController { // The instance of CardComponent for handling card payments. var cardComponent: CardComponent? // The function to configure and initialize an instance of CardComponent. func setupCardComponent() { // 1. Hide the default submit button in the CardComponent configuration. var cardComponentConfiguration = CardComponent.Configuration(showsSubmitButton: false) // 2. Decode the payment method response and get the card payment method. let paymentMethods = try JSONDecoder().decode(PaymentMethods.self, from: paymentMethodsResponse) let paymentMethod = paymentMethods.paymentMethod(ofType: CardPaymentMethod.self) else { // If no valid payment method is found, exit setup. return } // 3. Initialize the CardComponent with the payment method, context, and configuration. cardComponent = CardComponent(paymentMethod: paymentMethod, context: adyenContext, configuration: cardComponentConfiguration) // 4. Set the delegate to handle CardComponent callbacks. self.cardComponent = cardComponent cardComponent.delegate = self } override func viewDidLoad() { super.viewDidLoad() // 5. Create your custom button for starting the payment. let customSubmitButton = UIButton(frame: .zero) customSubmitButton.setTitle("Pay Now", for: .normal) customSubmitButton.backgroundColor = .systemBlue customSubmitButton.layer.cornerRadius = 8 customSubmitButton.addTarget(self, action: #selector(startPayment), for: .touchUpInside) // 6. Configure and initialize an instance of CardComponent. setupCardComponent() // 7. If the instance of CardComponent successfully initialized, add its view to the view hierarchy. if let cardView = cardComponent?.viewController.view { view.addSubview(cardView) // Optional: set constraints or position cardView. } // 8. Add your custom pay button to the view hierarchy. view.addSubview(customSubmitButton) // 9. Optional: set constraints or change the position of your custom submit button. // 10. Optional: configure additional UI elements or the layout. view.backgroundColor = .white } // The action that is triggered when the shopper selects your custom button. @objc func startPayment() { // 11. Validate the payment details that the shopper entered. if cardComponent?.validate() == true { // 12. If validation is successful, submit the payment. cardComponent?.submit() } else { // 13. If validation is unsuccessful, handle validation errors. For example, show an error message to the user. print("Validation failed. Please check your card details.") } } }
Localization
iOS Components support the languages listed here.
To customize a localization, add a new localizable.strings file for the language that you need. You can also override existing strings by using the same keys.
For example, to override the cardholder name field title, set the following on your localizable.strings file:
"adyen.card.nameItem.title" = "Your cardholder name";
For more information on iOS Components classes, see our reference documentation page.
To find localized strings, the library first checks your custom localizable.strings file, and then the default Adyen file.
You can use LocalizationParameters to customize the localization file name, bundle, or the separator for translation strings.
For example, if you store translations in MyLocalizable.strings files in the shared bundle CommonBundle:
let localizationParameters = LocalizationParameters(bundle: commonBundle, tableName: "MyLocalizable") cardComponentConfiguration.localizationParameters = localizationParameters