Supplied components
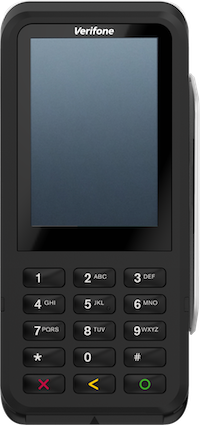
- P630 payment terminal
- USB cable and region-specific power plug for charging
- Accessories depending on the connection type, for example an Ethernet dongle
Get started
These are the steps to get your new P630 payment terminal up and running. Some steps include a link to more detailed instructions.
- Inspect the terminal.
- Turn on the terminal: connect the terminal to a power supply, then press and hold the power button until the display turns on.
Let the battery charge for at least four hours while you continue with the next steps. - On the Welcome screen, select your language.
- Connect the terminal to your network.
- On the Confirm store screen, assign the terminal to your store by selecting the check mark button. If the store shown is not your store, use the edit button to change it.
If the store screen doesn't show, wait until the next synchronization with the Adyen platform (on average three hours) and try again.
When you have completed these steps, you are ready to process payments!
Inspect the terminal
Como os terminais processam dados confidenciais do cartão, é importante garantir que o terminal que você recebeu seja o terminal Adyen correto e que não tenha sido adulterado. Se alguma das seguintes verificações falhar, entre em contato com nossa Support Team imediatamente.
-
Verifique se a caixa que contém o terminal não foi aberta e se o selo de segurança está intacto.
O selo de segurança é uma etiqueta vermelha com um código de barras e um número, colada na tampa da caixa. -
Se você tiver acesso à Customer Area da Adyen, faça o login e, em Point of sale, localize o pedido do seu terminal. Então:
- Verifique se o terminal serial number (S/N) na caixa é igual ao da área do cliente.
- Verifique se o security seal number na caixa é igual ao da área do cliente.
-
Usando as informações de track & trace na área do cliente, acompanhe o pedido com a transportadora para verificar se eles confirmam a entrega do terminal de pagamento.
-
Quebre o selo de segurança, retire o terminal da caixa e verifique se o terminal serial number (S/N) no próprio terminal é o mesmo que o número de série na caixa.
-
Inspecione o terminal quanto a adulteração. Verifique se faltam vedações ou parafusos, fios ou etiquetas adicionais, orifícios no dispositivo e qualquer coisa inserida ou conectada a qualquer parte do terminal, como o leitor de cartões ou as portas.
Connect to your network
Connect your terminal to the internet so that it can communicate with the plataforma de pagamentos da Adyen and your own back-end systems.
Connect to Wi-Fi
- After selecting your language on the Welcome screen, select the arrow button:

- On the Setup Wi-Fi screen, select the + sign.
- Turn on the WLAN toggle switch.
- Select a Wi-Fi network from the list, or select the + sign and add the name (SSID) of the Wi-Fi network.
- Enter the Wi-Fi password.
- Select OK.
The terminal sets the network as default automatically, and connects to it.
You'll now see a Wi-Fi icon at the top of the display.
Updating the connection settings
If you need to change Wi-Fi usage later:
- Select Settings > Network.
- Enter your passcode.
- Select Wi-Fi. You can now:
- Turn Wi-Fi on or off using the WLAN toggle switch.
- Add another network as described above.
Payment terminal menus
Your payment terminals have a menu with options related to payments, and a menu with options related to configuration. The access to some menu options is protected by passcodes.
The menu icons are disabled on P630. To access the terminal menus, on the keypad:
- For the Settings menu, press 9 and then the Confirm key
 .
. - For the Transactions menu press 8 and then the Confirm key .
| Menu/Button | Description | Passcode |
|---|---|---|
 Settings |
|
|
Transactions |
|
|
You can get the passcodes from your Customer Area or from your company's admin user.
Device info
To view information about the terminal:
- Open the Device info screen by pressing 5 and then the Confirm key on the terminal keypad.
The screen shows:
- Model, serial number, and IP address of the terminal.
- Software version that the terminal currently uses.
- The configuration version.
- Merchant account that the terminal belongs to.
- The store that the terminal is boarded to, and the store address.
- A button to show a QR code with device info.
When you contact our Support Team, they may ask you to scan this QR code.
View and reset totals
The terminal can generate a Totals report. This gives an overview of the total amounts for sales, refunds, gratuities (tips), and cancellations that the terminal processed since the last reset of the report. By resetting the report, you can use this functionality to get day totals or shift totals.
To obtain the Totals report:
- Select Transactions > Totals.
- Enter the Transactions menu passcode.
- You can now:
- View a Totals report for the period shown at the top of the report.
- Start a new reporting period by selecting the reset button:

- Access the report from the previous reporting period.
Resetting automatically
To automatically reset the Totals every day at a specific hour, contact our Support Team.
Airplane mode
For the airline industry the payment terminal has an airplane mode. When preparing for take-off, turning on airplane mode is the quickest way to turn off all cellular and other network connections on the terminal.
When you turn airplane mode off again, the previous connections are restored.
Enable airplane mode
To be able to use airplane mode, contact our Support Team and ask them to enable this feature. The Network menu on the terminal will then include an Airplane mode option.
Use airplane mode
To turn on airplane mode:
- On the terminal, select Settings > Network.
- Enter the passcode.
- In the Network menu, turn on the Airplane mode toggle.
All connections (Wi-Fi, Bluetooth, and Cellular) are now Off.
To turn off airplane mode:
- On the terminal, select Settings > Network.
- Enter the passcode.
- In the Network menu, turn off the Airplane mode toggle.
All previous connections (Wi-Fi, Bluetooth, and Cellular) are now restored.
Troubleshooting
Self-service
If there is an issue with your payment terminal, first try to diagnose and solve the issue yourself, using our Troubleshooting documentation. In many cases, this is the quickest solution.
Ask for assistance
If you cannot resolve the issue using the Troubleshooting documentation, contact to our Support Team.
Provide the following information:
- Merchant account.
- PSP reference of the transaction, if applicable.
- Terminal serial number. This number is available in the Device info and also printed on the back of the terminal (for example, S/N:123-456-789).