Keypad keys
| Key | Name |
|---|---|
 | Cancel |
 | Clear |
 | Confirm |
Supplied components
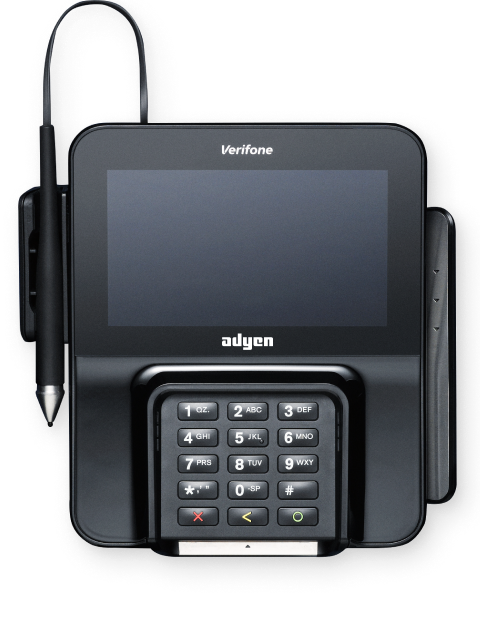
- M400 payment terminal
- Region-specific power cord
- Power supply
- Dongle (Cube Ethernet)
- Stylus pen
- Privacy shield
Get started
These are the steps to get your new M400 payment terminal up and running. Some steps include a link to more detailed instructions.
- Inspect the terminal.
- Open the cover on the back of the terminal, connect the dongle cable, and close the cover.
- Turn on the terminal by connecting it to a power source. During startup the display turns on and off a few times.
- Select Configure network. Then connect the terminal to your network.
- Select Board the terminal, select your store, and select Confirm. Boarding can take up to 30 minutes.
If Board the terminal doesn't show, wait until the next synchronization with the Adyen platform (on average three hours) and try again.
- Test the connection with the Adyen platform.
- Test the connection with your POS system.
When you have completed these steps, you are ready to process payments!
Inspect the terminal
Because payment terminals process sensitive card data, you must verify that the terminal you received is the correct one, supplied by Adyen, and hasn't been tampered with.
-
Verify that the box containing the terminal hasn't been opened and that the security seal is intact.
The security seal is a red label with a bar code and a number, stuck across the lid of the box. -
If you have access to the Adyen Customer Area, log in and under In-person payments > Orders and returns find the order for your terminal. Then:
- Verify that the serial number (S/N) on the box is the same as in the Customer Area.
- Verify that the security seal number on the box is the same as in the Customer Area.
-
Using the track & trace link, track the order with the carrier to verify that they confirm having delivered the payment terminal.
-
Break the security seal, take the terminal out of the box, and verify that the serial number (S/N) on the terminal is the same as the serial number on the box.
-
Inspect the terminal for tampering. Check for missing seals or screws, additional wires or labels, holes in the device, and anything inserted in or attached to any part of the terminal.
If any of the above checks fails, contact our Support Team immediately.
Connect to your network
Connect your terminal to the internet so that it can communicate with the Adyen payments platform. Follow the instructions for the network connection you want to use: Ethernet LAN or Wi-Fi.
Connect to Ethernet LAN
-
Connect an Ethernet cable to the Ethernet (LAN) port on the dongle.
That is the port marked with ETH or this symbol:
Connecting the wrong type of cable to the Ethernet port or connecting the Ethernet cable to the wrong port (for example, the RS232 port) may severely damage the terminal.
Connect to Wi-Fi
- On the terminal display, select Configure network.
- Select Wi-Fi.
- Turn on the Wi-Fi toggle switch.
- Select the + icon to add a network. The terminal scans for Wi-Fi networks.
- Choose the desired network from the list and enter the Wi-Fi password, or select Add manually and enter the name (SSID) of the Wi-Fi network and the Wi-Fi password.
- Select the check mark to confirm.
The terminal sets the network as default automatically, and connects to it.
You'll now see a Wi-Fi icon at the top of the display.
After the terminal is boarded
If you need to change Wi-Fi usage after the terminal is boarded:
- Select Settings > Network.
- Enter your passcode.
- Select Wi-Fi. You can now:
- Turn Wi-Fi on or off using the Wi-Fi toggle switch.
- Change IP settings.
- Add another network as described above.
Test the payments platform connection
Payments are processed on the Adyen payments platform. To test the connection with that platform:
- Select Settings > Diagnostics > PSP connection.
- Check if the Status is Successful.
You can also View results and check if all items have a green check mark .
.
Don't worry if Receiving data has a red cross and the result is No Error; the terminal successfully connected with our platform.
Test the POS system connection
To test the connection with your POS system:
- Select Settings > Diagnostics > Terminal API.
- Check if the Status is Successful.
You can also View results and check if all items have a green check mark. - Select the Cancel button to go back to Diagnostics, and select Endpoints.
The terminal runs tests on four URLs and then shows a final screen. - Check if the Status is Successful or select View results to check whether all four URLs in the final screen have a green check mark .
Turn on/off
If you turn on the payment terminal for the first time or after it was off for a long time, it may make a maintenance call to synchronize the configuration and update the software. This can take 10 to 20 minutes.
Turn on the terminal:
- Connect the terminal to a power supply.
During startup the display turns on and off a few times.
Reboot the terminal:
- Go to Settings and select Power.
- Enter your passcode.
- Select Restart and confirm.
Turn off the terminal:
- Disconnect the terminal from the power supply.
Payment terminal menus
Your payment terminals have a menu with options related to payments, and a menu with options related to configuration. The access to some menu options is protected by passcodes.
| Menu/Button | Description | Passcode |
|---|---|---|
 Settings |
|
|
Transactions |
|
|
 Payment |
|
|
From software version 1.90, all Android and non-Android payment terminals use the same menu structure. If your terminals are on an earlier version, they might be still using the old non-Android terminal menus.
Device info
To view information about the terminal:
- Select Settings > Device info.
The Device info screen shows:
- Model, serial number, and IP address of the terminal.
- Software version and configuration version that the terminal currently uses.
- Merchant account and store that the terminal belongs to.
- A button to show a QR code with device info.
When you contact our Support Team, they may ask you to scan this QR code.
Troubleshooting
Self-service
If there is an issue with your payment terminal, first try to diagnose and solve the issue yourself, using our Troubleshooting documentation. In many cases, this is the quickest solution.
Ask for assistance
If you can't resolve the issue using the Troubleshooting documentation, contact to our Support Team.
Provide the following information:
- Merchant account.
- PSP reference of the transaction, if applicable.
- Terminal serial number. This number is available in the Device info and also printed on the back of the terminal (for example, S/N:123-456-789).