One of the steps in the integration checklist is to set up your test standalone terminals. This involves making your test terminals ready for standalone use, optionally configuring a refund passcode and tipping feature. There are two ways to do these tasks:
- From your Customer Area
- Using API calls
Requirements
Before you begin, take into account the following requirements and preparations.
| Requirement | Description |
|---|---|
| Integration type | Standalone . |
| API credentials | To set up your terminal using API calls, you must have an API credential with an API key and the following roles:
If in addition to a standalone solution, you also have a Terminal API integration with cloud-based communications, you can use the existing API key that you use for Terminal API requests. |
| Customer Area roles | To set up your terminal from the Customer Area, you need the following roles:
|
| Limitations | Note the following:
|
| Hardware | A standalone payment terminal. |
| Setup steps | When going live, you need to set up your live standalone terminals in the same way as you did for your test terminals. |
Set up standalone
You can make your terminals ready for standalone use in your Customer Area or using an API call.
Configure tipping
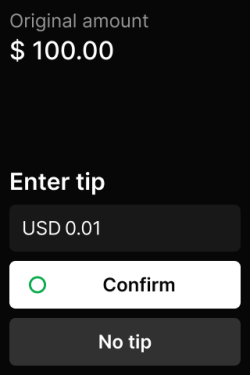
It is possible to ask for a tip without tipping options. The payment terminal then shows a prompt to enter a tip plus an option for not giving a tip. To give a tip, the customer enters the amount and confirms.
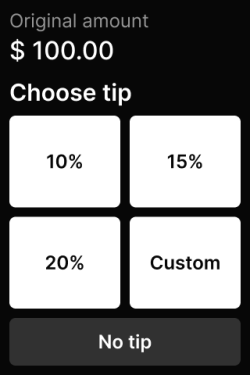
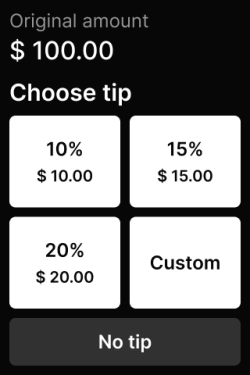
To make tipping easier for your customers, you can define tipping options that your customer can select on the terminal. The options can be any combination of percentages, calculated amounts, and a custom amount. You can configure the terminal to show only the percentage, the percentage and the calculated total amount together and only the fixed tip amount.
Tipping without options:  |
Tipping with percentage options:  |
Percentage and calculated tip amounts:  |
You can configure tipping either from your Customer Area or by using the Management API call.
Configure compliant tipping in Quebec, Canada
A regulation in Quebec, Canada requires tips to be calculated on pre-tax amounts. To facilitate compliance with this regulation, we recommend choosing one of the following tipping options:
- The terminal asks the shopper to enter the tip manually.
- The terminal shows predefined tipping options for specific CAD amounts and the option to enter a custom tip amount.
To configure tipping option to facilitate compliance with regulations in Quebec, Canada:
- Decide what method you want to use: let the shopper enter a tip, or show predefined fixed amounts.
- Set up tipping in the same way as described under configure tipping, but:
- At Enable standalone tipping select Enabled.
- Select Save.
Configure refund passcode
Because making refunds on standalone payment terminals is risky, you can enable a 6-digit passcode needed to initiate refunds. You set up the Refunds passcode in addition to the Transactions passcode, which means that you need to enter both to initiate a refund.
You can configure this in your Customer Area or using an API call.
Payment facilitators
If you are a payment facilitator, card schemes require you to provide certain data about your sub-merchant with each transaction. That is because your sub-merchant is considered the Merchant of Record when you facilitate a transaction.
Adyen automatically adds certain sub-merchant data to transactions that you facilitate. To supply the remaining data, you must add that data to the configuration of the sub-merchant's store.
Testing
For information on how you can make test payments and refunds, see testing your integration.
Any test transactions you make, will appear in your Customer Area, under Transactions > Payments.