You can create a flow that spans multiple requests, including input, display, and payment requests. To do so, you send an admin request to start a session. The terminal shows the waiting screen after every input, display, and payment request until you end the session. This solves the issue that customers may think something is wrong if they provide input and then do not see anything happening on the terminal. The waiting screen is shown for a set amount of time, or until the next request is sent to the terminal.
This is useful for payment flows where someone needs to interact with a terminal, like Pay at Table. It shows that the POS system is not unresponsive, it is just busy doing something that takes a bit of time.
How it works
You need to send two separate admin requests to mark the start and the end of a session. All requests in between belong to a single session.
To include multiple requests in one session:
-
Before you send the first request, send an admin request to start the session.
-
Send multiple requests, including input, display, and payment requests.
When you send an input request, after the user provides input on the terminal, the waiting screen shows for the set amount of time. With display and payment requests, after showing your data on the screen, the waiting screen shows. If you send another request before the waiting screen expires, the waiting screen disappears.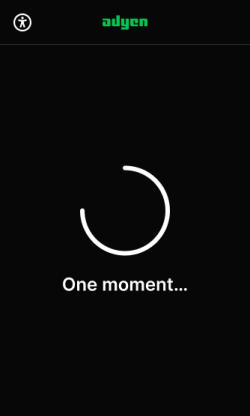
-
After the last request, send an admin request to end the session.
Step 1: Start the session
-
Create a JSON object with the following data elements:
Parameter Required Description Session
An object with: ID: the unique reference of the session.Type: set the value to Begin to start the session.
OperationAn object with: Type: the type of request after which the waiting screen shows: InputRequest, DisplayRequest, and Payment .Variant: WaitingScreen.UserInterfaceData.WaitingScreenTimeoutMs: how long the waiting screen is shown on the terminal display, in milliseconds.
For now, the
Operation.Variantcan only have WaitingScreen as value. This shows the waiting screen animation on the terminal after every request until you end the session. -
Encode the JSON object to Base64.
-
Make a Terminal API admin request, specifying:
-
The standard
SaleToPOIRequest.MessageHeaderobject, withMessageClassset to Service andMessageCategoryset to Admin.Parameter Required Description ProtocolVersion3.0 MessageClassService MessageCategoryAdmin MessageTypeRequest ServiceIDYour unique ID for this request, consisting of 1-10 alphanumeric characters. Must be unique within the last 48 hours for the terminal ( POIID) being used.SaleIDYour unique ID for the POS system component to send this request from. POIIDThe unique ID of the terminal to send this request to. Format: [device model]-[serial number].
- The AdminRequest object, including:
ServiceIdentification: The Base64-encoded JSON object to begin the session.
-
-
Check that the AdminResponse shows
Response.ResultSuccess.
Step 2: Send requests
- Start sending the requests that you specified in the
operation.type, including input, display, and payment requests. - After every request sent, the screen shows the waiting screen for the amount of time specified in milliseconds in
UserInterfaceData.WaitingScreenTimeoutMs. - Every new request interrupts the waiting screen.
Step 3: End the session
-
Create a JSON object with the following data elements:
Parameter Required Description ServiceIdentification.SessionAn object with: Id: the unique reference of the session. This must be the sameIdas in the start sessionAdminRequest).Type: set the value to End.
-
Encode the JSON object to Base64.
-
Make a Terminal API admin request like you did in Step 1, including:
- The AdminRequest object with:
ServiceIdentification: The Base64-encoded JSON object to end the session.
- The AdminRequest object with:
-
Check that the AdminResponse shows
Response.ResultSuccess (see Step 1).
You can send an admin request to end the session while the waiting screen is still on the display. This does not interrupt the waiting screen like other requests.
After the session ends, the waiting screen no longer shows after sent input, display, or payment requests.