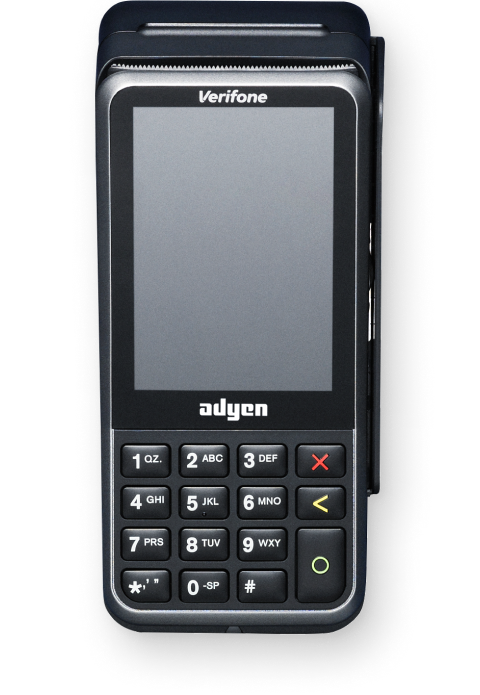
Keypad keys
| Key | Name |
|---|---|
 | Cancel |
 | Clear |
 | Confirm |
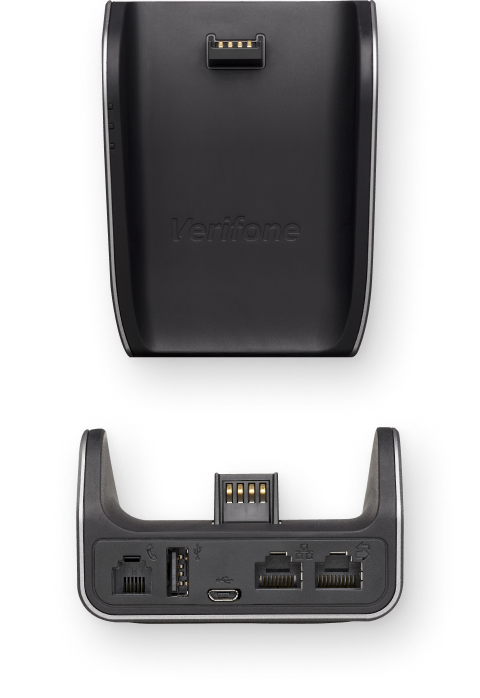
The Bluetooth base station lets you:
- Connect the V400m to your Ethernet LAN, regardless of whether the V400m is docked in the base station, or undocked.
- Charge the V400m when it is docked in the base station.
Supplied components
- V400m payment terminal
- Power supply
- SIM card
- Receipt paper roll 57 x 40 mm (Width x Diameter)
- Bluetooth base station
In the Adyen Customer Area, under Devices > Orders & returns you can order new paper rolls.
Get started
These are the steps to get your new V400m payment terminal up and running. Some steps include a link to more detailed instructions.
- Inspect the terminal.
- Turn on the terminal by connecting it to a power source. During startup the display turns on and off a few times. Let the battery charge for at least four hours while you continue with the next steps.
- Select Configure network. Then temporarily connect the terminal to Wi-Fi.
Do not dock the terminal into the Bluetooth base yet.
- Select Board the terminal, select your store, and select Confirm. Boarding can take up to 30 minutes.
If Board the terminal doesn't show, wait until the next synchronization with the Adyen platform (on average three hours) and try again.
- Set up the base station and the Bluetooth connection.
- Test the connection with the Adyen platform.
- Test the connection with your POS system. Skip this step if you will use the terminal as a standalone terminal.
When you have completed these steps, you are ready to process payments!
Inspect the terminal
Because payment terminals process sensitive card data, you must verify that the terminal you received is the correct one, supplied by Adyen, and has not been tampered with.
-
Verify that the shipping box containing the terminal has not been opened and that the tamper-evident security packing tape is intact.
-
If you have access to the Adyen Customer Area, log in and under Devices > Orders & returns find the order for your terminal. Then:
- Verify that the serial number (S/N) on the box is the same as in the Customer Area.
- Using the track & trace link, track the order with the carrier to verify that they confirm having delivered the payment terminal.
-
Open the box, take the terminal out of the box, and verify that the serial number (S/N) on the terminal is the same as the serial number on the box.
-
Inspect the terminal for tampering. Check for missing screws, additional wires or labels, holes in the device, and anything inserted in or attached to any part of the terminal.
If any of the above checks fails, contact our Support Team immediately.
Insert the receipt paper roll
- Pull up the latch of the paper compartment and swing the cover downwards.
- Insert the paper roll making sure the paper sticks out a bit.
- Close the cover of the paper roll compartment.
Connect to your network
Connect your terminal to the internet so that it can communicate with the Adyen payments platform.
Connect to Wi-Fi
- On the terminal display, select Configure network.
- Select Wi-Fi.
- Turn on the Wi-Fi toggle switch.
- Select the + icon to add a network. The terminal scans for Wi-Fi networks.
- Choose the desired network from the list and enter the Wi-Fi password, or select Add manually and enter the name (SSID) of the Wi-Fi network and the Wi-Fi password.
- Select the check mark to confirm.
The terminal sets the network as default automatically, and connects to it.
You'll now see a Wi-Fi icon at the top of the display.
After the terminal is boarded
If you need to change Wi-Fi usage after the terminal is boarded:
- Select Settings > Network.
- Enter your passcode.
- Select Wi-Fi. You can now:
- Turn Wi-Fi on or off using the Wi-Fi toggle switch.
- Change IP settings.
- Add another network as described above.
Cellular failover
Your V400m terminal can automatically switch to processing payments using a cellular connection when the internet connection fails. Adyen terminals come with a pre-installed and activated SIM (eSIM) card, so you can use the cellular network immediately to board the terminal.
However, terminals boarded before 2022 might not have the SIM card activated if you did not set up the card subscription with us at the time.
When in doubt, contact our Support Team.
Set up the base station and the Bluetooth connection
Instead of using a Wi-Fi connection, you can connect an Ethernet cable to the base station and connect your V400m to the base station through Bluetooth. The terminal then uses the Ethernet connection regardless of whether it is docked in the base station, or undocked.
The base station obtains its software from the terminal. When boarding the terminal, the initial software on the terminal is replaced with the software version that is required for your store. To prevent issues with a base station becoming stuck, you need to board the terminal before you dock it into the base station for the first time. For that reason, you need to temporarily connect the terminal to Wi-Fi and board the terminal before you set up the Bluetooth connection.
Before you can pair the terminal to the base station, the terminal must be boarded.
To pair the terminal to the base station:
-
On the terminal, open the Admin menu, select Network > Wi-Fi, and turn off the Wi-Fi toggle switch.
-
Connect the base station to a power supply. The top white LED starts to blink.
-
Wait until the white LED stops blinking and turns on; this indicates the base station has finished starting up.
-
Connect an Ethernet cable from your network to the Ethernet (LAN) port on the base station. That is the port marked with this symbol:
 .
.Do not use a port with a different symbol.
-
Dock the terminal into the base station.
-
On the base station, press the pairing button on the front to make it discoverable. The blue LED starts to blink slowly.
-
On the terminal, open the Admin menu, select Network > Bluetooth, and turn on the Bluetooth toggle switch.
If Bluetooth is on already, turn it off and then on again. -
Select the plus button
 to pair a device (or on earlier releases, select Pair device > Scan).
The terminal scans for available devices. -
Select the base station that you want to connect to, making sure that the serial number shown matches the serial number on the base station. For example, V400m B-FF 123-456-789.
The terminal shows the progress: "Pairing", "Paired", "Connecting", and finally "Connected".
There should now be a Bluetooth icon at the top of the terminal display, and on the base station the blue LED should be on continuously. -
Verify that IP addresses have been assigned to the terminal and the base station:
- To check the terminal's IP address, open the Info menu. This should show Bluetooth followed by an IP address.
- To check the base station's IP address, open the Admin menu and select Network > Bluetooth > Info. This should show an IP address.
It can take some time before IP addresses are assigned through DHCP.
-
For an integration with local communications, update the POS system with the terminal's Bluetooth IP address. You may need to restart the POS system, and this may cause the terminal to restart.
If you need help with this step, contact your IT department.
If you have more than one terminal or base station, ensure you know which terminal is paired with which base station. After a terminal is paired with a base station, it should remain paired with it.
Test the payments platform connection
Payments are processed on the Adyen payments platform. To test the connection with that platform:
- Select Settings > Diagnostics > PSP connection.
- Check if the Status is Successful.
You can also View results and check if all items have a green check mark .
.
Do not worry if Receiving data has a red cross and the result is No Error; the terminal successfully connected with our platform.
Test the POS system connection
If you are going to use the terminal with a POS system (not as a standalone terminal), test the connection with your POS system:
- Select Settings > Diagnostics > Terminal API.
- Check if the Status is Successful.
You can also View results and check if all items have a green check mark. - Select the Cancel button to go back to Diagnostics, and select Endpoints.
The terminal runs tests on four URLs and then shows a final screen. - Check if the Status is Successful or select View results to check whether all four URLs in the final screen have a green check mark .
Payment terminal menus
Your payment terminals have a menu with options related to payments, and a menu with options related to configuration. The access to some menu options is protected by passcodes.
| Menu/Button | Description | Passcode |
|---|---|---|
 Settings |
|
|
Transactions |
|
|
 Payment |
|
|
From software version 1.90, all Android and non-Android payment terminals use the same menu structure. If your terminals are on an earlier version, they might be still using the old non-Android terminal menus.
Device info
To view information about the terminal:
- Select Settings > Device info.
The Device info screen shows:
- Model, serial number, and IP address of the terminal.
- Software version and configuration version that the terminal currently uses.
- Merchant account and store that the terminal belongs to.
- A button to show a QR code with device info.
When you contact our Support Team, they may ask you to scan this QR code.
Turn on/off
If you turn on the payment terminal for the first time or after it was off for a long time, it may make a maintenance call to synchronize the configuration and update the software. This can take 10 to 20 minutes.
When connected to a power supply, the battery charges. An icon at the top of the display indicates the battery charge level.
Turn on the terminal:
- Connect the terminal to a power supply.
or - Press and hold the Confirm key until the display turns on. The battery charge level needs to be high enough for the terminal to turn on.
During startup the display turns on and off a few times.
Turn off the terminal:
- Go to Settings and select Power.
- Enter your passcode.
- Select Power off and confirm.
You can also press and hold the Cancel key until (after 5 - 20 seconds) the display turns off.
Maintain battery performance
Storing payment terminals for longer periods of time can reduce the capacity of the battery or damage it permanently.
To prevent battery degradation:
-
Check the storage conditions:
- Store the terminals in a cool, dry place.
- Keep the terminals away from direct sunlight or heat sources.
- Avoid overcharging - do not store terminals with battery levels over 70 percent.
- Avoid discharging - do not store terminals with battery levels below 40 percent.
-
Inspect the batteries regularly:
- Every six months, check for battery leakage or swelling.
- Recharge batteries to the optimal level.
In case of battery failure, you can return or replace the terminal. For certain models, you can order spare batteries.
When returning a payment terminal, make sure to dispose of the faulty battery according to your local regulations. Do not include the faulty battery in the return package as it can lead to leakage and thermal discharge.
For more information, refer to Manage battery power.
View, print, and reset totals
The terminal can generate a Totals report. This gives an overview of the total amounts for sales, refunds, gratuities (tips), and cancellations that the terminal processed since the last reset of the report. By resetting the report, you can use this functionality to get day totals or shift totals.
- Go to the Transactions menu.
- Enter the Transactions menu passcode.
- Under History, you can get the details of past transactions.
- Under Totals, you can:
- View the Totals report for the period shown at the top of the report. It also shows the totals per card scheme used.
- Print the Totals report.
(Optional) To reset the counter after printing the (day or shift) totals, select Yes at the Reset totals? prompt. - Select Reset to start a new reporting period. The totals from the previous period are no longer shown.
- Access the report from the previous reporting period.
Resetting automatically
To automatically reset the Totals every day at a specific hour, contact our Support Team.
Reprint transaction receipt
To print another copy of the shopper or merchant receipt for a specific transaction:
- Go to the Transactions menu.
- Select History.
- Select the transaction that you want to reprint a receipt for.
- Select the printer icon.
- Select Shopper receipt or Merchant receipt.
The terminal prints the selected receipt.
Standalone solution
If you will be using the payment terminal as a standalone terminal, transactions are not initiated from a POS system. Instead, you start transactions from the terminal itself.
Refer to Standalone terminals for instructions on how to make payments, cancel payments, issue refunds, and (when needed) manually enter card details to make a payment.
Troubleshooting
Self-service
If there is an issue with your payment terminal, first try to diagnose and solve the issue yourself, using our Troubleshooting documentation. In many cases, this is the quickest solution.
Ask for assistance
If you cannot resolve the issue using the Troubleshooting documentation, contact our Support Team. Provide the following information:- Merchant account.
- PSP reference of the transaction, if applicable.
- Terminal serial number. This number is available in the Device info and also printed on the back of the terminal (for example, S/N:123-456-789).