Here we describe how you can use an input request to show some information on the display of the payment terminal and ask the shopper to confirm they agree.
Requirements
Before you begin, take into account the following requirement.
| Requirement | Description |
|---|---|
| Integration type | A Terminal API integration with payment terminals. |
How it works
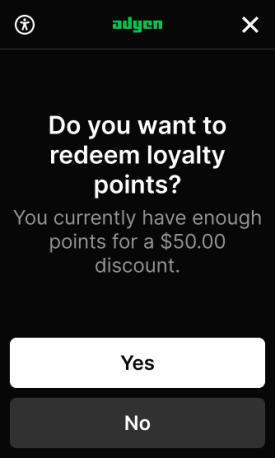
When you use a GetConfirmation InputRequest, the terminal shows some information on the display of the terminal and asks the shopper to confirm they agree. The terminal continues to show your input request until one of these events occurs:
- The user has provided input.
- The maximum input time expires. You can set this time in the request.
- On the terminal, Cancel
 is selected.
 - The terminal receives a request to cancel collecting input or any other request from the POS app.
Examples
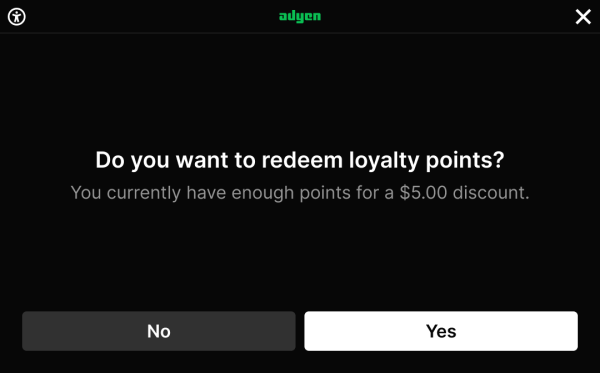
The following illustrations show a confirmation screen on a portrait, small portrait, and landscape display.

Make a Confirmation input request
To use the payment terminal to ask a shopper to confirm something:
-
Make a Terminal API input request, specifying:
-
The standard
SaleToPOIRequest.MessageHeaderobject, withMessageClassset to Device andMessageCategoryset to Input.Parameter Required Description ProtocolVersion
3.0 MessageClassDevice MessageCategoryInput MessageTypeRequest ServiceIDYour unique ID for this request, consisting of 1-10 alphanumeric characters. Must be unique within the last 48 hours for the terminal ( POIID) being used.SaleIDYour unique ID for the system where you send this request from. POIIDThe unique ID of the terminal to send this request to. Format: [device model]-[serial number].
-
The InputRequest.DisplayOutput object to define what is shown on the terminal:
Parameter Description DeviceCustomerDisplay InfoQualifyDisplay OutputContent.OutputFormatText OutputContent.PredefinedContent.ReferenceIDGetConfirmation OutputContent.OutputTextAn array of four Textfields containing your own text to show on the terminal:- The title. On a portrait display, this is limited to about 20 characters.
- Additional text which can be long. Use
\nto add a line break. - The label for the "Cancel" button on the left.
- The label for the "Confirm" button on the right.
-
The InputRequest.InputData object to handle the user input:
Parameter Description DeviceCustomerInput InfoQualifyInput InputCommandGetConfirmation MaxInputTime(Integer) Time-out in seconds. This is the time that the user gets to finish their input.
The following example asks the shopper to confirm they agree.
-
-
Wait for the user to supply the requested input.
The input is not validated against a format.
If input is received from the terminal, the input response includes an InputResult object with:
Input.ConfirmedFlag: true indicates the shopper confirmed their agreement by selecting the right button on the display ("Agree") or the Confirm key on the keypad.
Input.ConfirmedFlag: false means the shopper selected the left button on the display ("Decline") or the Cancel key on the keypad.
-
If the input request times out, the
InputResult.ResponsehasAdditionalResponse: message=Screen%20timeout,Result: Failure, andErrorCondition: Cancel. -
If you make a payment request while the input request is waiting for input on the terminal, the payment request overrides the input request. The
InputResult.ResponsehasAdditionalResponse: message=A%20higher%20priority%20request%20has%20been%20received,Result: Failure, andErrorCondition: Busy.
-
Pass the relevant data from
InputResult.Inputto your system for validation and further use.