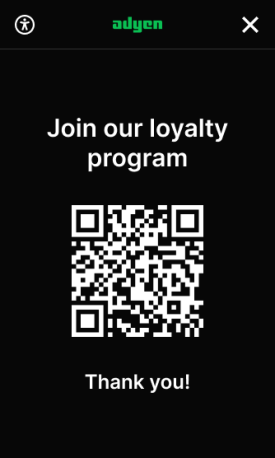
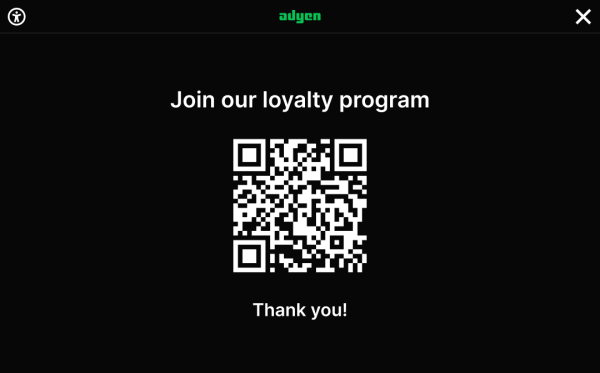
You can use the display of your payment terminal to show a QR code which the shopper can scan with their mobile device. The QR code can contain anything you like. For example, a URL to join your loyalty program or to download an app, a message with a link to a promotional offer, or an invitation to visit your webshop. You can also add a header and footer to explain what the QR code is for.
The terminal shows the QR code during the time you set in the request. If you do not set a time-out, the QR code continues to be shown until you send another request. For example, a payment request, or a request to show the standby screen.
The following illustrations show a QR code with header and footer on a portrait, small portrait, and landscape display.


Make a display request for a QR code
-
If the QR code needs to contain more than just a URL, convert the content to a URL-encoded string. You'll need to specify the URL-encoded string in the display request, in the
OutputContent.OutputBarcode.BarcodeValue.For example, if the QR code should have this content:
Visit www.adyen.com/pos-payments and:
- Learn about the features we support
- Choose from a range of terminals
The resulting URL-encoded string will look like this:
Visit%20www.adyen.com%2Fpos-payments%20and%3A%0A-%20Learn%20about%20the%20features%20we%20support%0A-%20Choose%20from%20a%20range%20of%20terminalsIf the QR code needs to contain only a URL, for example
https://www.adyen.com/pos-payments, there is no need to URL-encode that. You'll specify the URL in the display request as a plain text string. -
Make a Terminal API display request, specifying:
-
The standard
SaleToPOIRequest.MessageHeaderobject, withMessageClassset to Device andMessageCategoryset to Display.Parameter Required Description ProtocolVersion
3.0 MessageClass
Device MessageCategory
Display MessageType
Request ServiceID
Your unique ID for this request, consisting of 1-10 alphanumeric characters. Must be unique within the last 48 hours for the terminal ( POIID) being used.SaleID
Your unique ID for the POS system component to send this request from. POIID
The unique ID of the terminal to send this request to. Format: [device model]-[serial number].
-
The DisplayRequest.DisplayOutput array, with items representing the elements to show on the terminal display. This includes the QR code and optionally a header and/or footer.
QR code:
Parameter Description DeviceCustomerDisplay InfoQualifyDisplay MinimumDisplayTimeThe number of seconds that the QR code screen is shown.
If you omit this parameter, the terminal shows the QR code screen until you send another request, for example, a request to show the standby screen.ResponseRequiredFlagIf not specified, defaults to true. The response then informs you whether this element was successfully shown. OutputContent.OutputFormatBarCode OutputContent.OutputBarcode.BarcodeTypeQRCode OutputContent.OutputBarcode.BarcodeValueThe content of the QR code, specified either as a plain text string, or as a URL encoded string. (See step 1.) Header and footer (optional):
The header and footer are both text array items with the same structure. If you specify one text array item, that will be interpreted as the header. If you specify a second text array item, that will be interpreted as the footer.
Parameter Description DeviceCustomerDisplay InfoQualifyDisplay ResponseRequiredFlagIf not specified, defaults to true. The response then informs you whether this element was successfully shown. OutputContent.OutputFormatText OutputContent.OutputTextAn array with a Textparameter containing your text to show above the QR code (header element) or below the QR code (footer element).
-
-
In the display response, check the OutputResult. This array indicates whether the elements were successfully shown. The first item in the array refers to the first item in the
DisplayOutputarray , and so on.