Starting January 31st, 2024, the /payments/details API call is no longer required for Klarna transactions. However, you can continue using this step to check the final payment status. To ensure you are informed of the final payment status for all transactions, you also need to use webhooks to update your order management system.
Accept Klarna payments using our APIs, and build your own payment form to have full control over the look and feel of your checkout page.
With our API-only integration, you can accept Klarna payments using either:
- The Klarna widget: the shopper completes the payment in your checkout.
For more information about the Klarna widget, see the Klarna documentation. - Redirect to Klarna: the shopper is redirected to Klarna to complete the payment.
When making a Klarna payment:
- Provide information about the purchased items by specifying
lineItemsin your payment request. - Indicate in your payment request if you want to use the Klarna widget or redirect to Klarna.
- Capture the payment after the goods have been sent. This triggers the payment instructions to be sent to the shopper.
Requirements
| Requirement | Description |
|---|---|
| Integration type | Make sure that you have built an API-only integration. |
| Setup steps | Before you begin, add Klarna in your test Customer Area. |
- Set up webhooks to know the payment outcome.
Build your payment form for Klarna
When making a Klarna payment, collect the following shopper details:
| Shopper detail | Description | Required |
|---|---|---|
| Shopper name | The shopper's full name and gender, if specified. | |
| Shopper email | The shopper's email address. This is where Klarna will send the invoice. | |
| The billing address | The postal address to be included on the invoice. |
For improved conversion rates, we strongly recommend that you collect the shopper name and the billing address.
If you are using the /paymentMethods endpoint to show the available payment methods to the shopper, specify in your request one of the following combinations of countryCode and amount.currency, depending on which Klarna payment method you want to accept:
| Country/region | countryCode |
amount.currency |
Pay now | Pay later | Pay over time |
|---|---|---|---|---|---|
| Australia | AU | AUD |  |
|
 |
| Austria | AT | EUR | |
|
|
| Belgium | BE | EUR | |
|
|
| Canada | CA | CAD | |
|
|
| Czech Republic | CZ | CZK | |
|
|
| Denmark | DK | DKK | |
|
|
| Finland | FI | EUR | |
|
|
| France | FR | EUR | |
|
|
| Germany | DE | EUR | |
|
|
| Greece | GR | EUR | |
|
|
| Ireland | IE | EUR | |
|
|
| Italy | IT | EUR | |
|
|
| Norway | NO | NOK | |
|
|
| Poland | PL | PLN | |
|
|
| Portugal | PT | EUR | |
|
|
| Romania | RO | RON | |
|
|
| Spain | ES | EUR | |
|
|
| Sweden | SE | SEK | |
|
|
| Switzerland | CH | CHF | See note 3 |
See note 3 |
|
| The Netherlands | NL | EUR | |
|
|
| United Kingdom | GB | GBP | |
|
|
| United States | US | USD | |
|
|
3If you want to offer Klarna in Switzerland, contact our Support Team.
The /paymentMethods response contains:
paymentMethod.type: klarna_paynow for Klarna Pay Now.paymentMethod.type: klarna for Klarna buy now pay later.paymentMethod.type: klarna_account for Klarna Pay Over Time.
We provide logos for Klarna that you can use on your payment form. For more information, refer to Downloading logos.
Make a payment
Klarna requires shopper details such as name and address to approve a payment. To improve shopper experience and conversion rates, provide these details in the payment request and make sure that the parameters in the request match.
Send the shopper name and billing address in the request.
We recommend that you send the shopper name and billing address to improve the shopper experience. If not provided in the request, Klarna will ask the shopper to provide these parameters in the checkout page.
Make sure that the country, the currency, and the shopper locale in the request are compatible.
- Klarna will only approve the payment if the country it is made from matches the currency and the country specified in the billing address.
- The Klarna checkout page can only be rendered in another language if the specified locale matches the country and currency used in the request. By default, the checkout page is rendered is English (
en-US).
The following table shows the possible combinations that you can send in a payment request:
| Country | countryCodebillingAddress.country |
amount.currency |
shopperLocaledefault |
shopperLocale alternative |
|---|---|---|---|---|
| Australia | AU | AUD | en_US |
en_GB |
| Austria | AT | EUR | en_US |
de_AT |
| Belgium | BE | EUR | en_US |
nl_BE, fr_BE |
| Canada | CA | CAD | en_US |
fr_FR |
| Czechia | CZ | CZK | en_US |
cs_CZ |
| Denmark | DK | DKK | en_US |
da_DK |
| Finland | FI | EUR | en_US |
fi_FI, sv_FI |
| France | FR | EUR | en_US |
fr_FR, en_FR |
| Germany | DE | EUR | en_US |
de_DE |
| Greece | GR | EUR | en_US |
el_GR |
| Ireland | IE | EUR | en_US |
en_GB |
| Italy | IT | EUR | en_US |
it_IT |
| Norway | NO | NOK | en_US |
nb_NO |
| Poland | PL | PLN | en_US |
pl_PL |
| Portugal | PT | EUR | en_US |
pt_PT |
| Romania | RO | RON | en_US |
ro_RO |
| Spain | ES | EUR | en_US |
es_ES |
| Sweden | SE | SEK | en_US |
sv_SE |
| Switzerland | CH | CHF | en_US |
de_CH, fr_CH, it_CH |
| The Netherlands | NL | EUR | en_US |
nl_NL |
| United Kingdom | GB | GBP | en_US |
en_GB |
| United States | US | USD | en_US |
es_US |
Make a payment request
From your server, make a /payments request, specifying:
paymentMethod.type: The type of Klarna payment the shopper wants to use. Possible values:- klarna_paynow for Klarna Pay Now.
- klarna for Klarna buy now pay later.
- klarna_account for Klarna Pay Over Time.
-
How you want the shopper to complete the payment:
-
On your own checkout using the Klarna widget: add
paymentMethod.subtypewith a value of sdk. For example:{ ... "paymentMethod": { "type":"klarna", "subtype":"sdk" }, ... } -
Using a redirect to Klarna: do not add the
paymentMethod.subtypeparameter.
-
| Parameter name | Required | Description |
|---|---|---|
| lineItems | |
Price and product information about the purchased items. For Klarna to approve the payment, the total amount specified in lineItems must match the amount.value, and each line item must include a description. You can optionally specify productUrl and imageUrl to include a link to and a picture of the purchased items in the invoice. |
| shopperEmail | See note 1 |
The shopper's email address. This is where Klarna will send the payment instructions. For requirements on this field, see Klarna's documentation. |
| shopperReference | |
A unique reference to identify the shopper (minimum length three characters). |
| shopperName | The shopper's full name. Recommended to increase conversion rates. If you do not include it, Klarna will ask the shopper to provide this in the checkout page. For requirements on this field, see Klarna's documentation. |
|
| billingAddress | The postal address of the shopper. Recommended to increase conversion rates. If you do not include it, Klarna will ask the shopper to provide this in the checkout page. For requirements on this field, see Klarna's documentation. |
|
| deliveryAddress | The postal address where the purchased goods should be delivered. If not provided, this is the same as the billing address. For requirements on this field, see Klarna's documentation. If the recipient name is different from the shopper making the payment, specify deliveryAddress.firstName and deliveryAddress.lastName to share the recipient name with Klarna. |
|
| shopperLocale | A combination of language code and country code to define the language of the Klarna checkout page. By default, the checkout page is rendered is English. This has to match the countryCode and currency used in the request. For more information, see Klarna's documentation. |
|
| countryCode | |
The shopper's country. This has to match the country of the billingAddress. |
| telephoneNumber | The shopper's telephone number, if provided. For requirements on this field, see Klarna's documentation. |
|
| additionalData. openinvoicedata.merchantData |
For some products or business models, Klarna can require additional information. If you need to send in this information, specify here the Base64 encoded JSON of the attachment.body value described in Klarna's documentation. Do not include this in the test environment, because test values cause an error. |
1You need to include shopperEmail to defend against potential disputes from shoppers.
A sample /payments request for Klarna — Pay later using a redirect:
The response to your /payments call depends on whether you are using:
The Klarna widget
The response to your /paymentsrequest contains:
resultCode: PendingpaymentData: A value that you need to submit to the /payments/details endpoint later.redirect: Object containing a client token.
- Use the client token to populate the Klarna widget.
This opens an iframe where the shopper has to enter their details. - After the shopper has submitted the details, you will receive an
authorization_token. For more information about theauthorization_token, see the Klarna documentation. -
Verify the result of the payment by making a /payments/details call, providing:
authorization_token: You received this in the previous step.paymentData: The value from the response to your /payments call.{ "paymentData":"abcxyz...", "details":{ "token":"eba4d492-ddd4-6dd3-ad31-5ba2ad6a86d0" } }
The response contains a
pspReference, which is our unique identifier for this payment, and aresultCode. - Use the
resultCodeto present the payment result to your shopper.
Starting January 31st, 2024, the /payments/details API call is no longer required for Klarna transactions. However, you can continue using this step to check the final payment status. To ensure you are informed of the final payment status for all transactions, you also need to use webhooks to update your order management system.
Redirect to Klarna
The /payments response includes the action object with information that you must use to redirect the shopper.
Handle the redirect
-
To complete the payment, redirect the shopper to the
action.urlreturned in the /payments response, taking into account the following recommendations:-
When using the HTTP GET method:
For security reasons, when showing the redirect in the app, we recommend that you use SFSafariViewController for iOS or Chrome Custom Tabs for Android, instead of WebView objects. Also refer to the security best practices for WebView. -
Redirection for mobile integrations:
For mobile integrations, we strongly recommended that you redirect the shopper to the default browser of their device. Redirecting to the default browser ensures the best compatibility, handling of multi-factor authentication, app-to-app redirection, and error handling.
-
-
After the shopper is redirected back to your website, check the payment result by making a POST /payments/details request, specifying:
details: object that contains the URL-decodedredirectResultreturned when the shopper was redirected back to your site.
-
In the response note the following:
resultCode: use this to present the result to your shopper.pspReference: our unique identifier for the transaction.
Present the payment result
Use the resultCode from the /payments/details response to present the payment result to your shopper. The resultCode values you can receive for Klarna are:
| resultCode | Description | Action to take | |
|---|---|---|---|
| Authorised | The payment was successful. | Inform the shopper that the payment was successful. After the goods have been sent, you also need to capture the payment. | |
| Cancelled | The shopper cancelled the payment. | Ask the shopper whether they want to continue with the order, or ask them to select a different payment method. | |
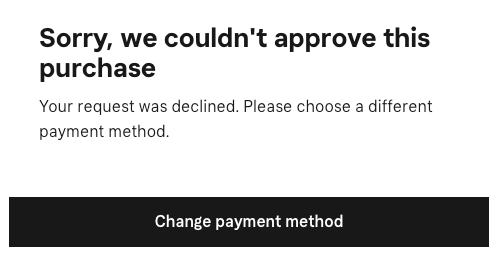
| Refused | The payment was refused by Klarna, as it didn't pass their risk checks. | Ask the shopper to try the payment again using a different payment method. |
When a payment is refused by Klarna, the shopper sees the following message:
Starting January 31st, 2024, the /payments/details API call is no longer required for Klarna transactions. However, you can continue using this step to check the final payment status. To ensure you are informed of the final payment status for all transactions, you also need to use webhooks to update your order management system.
Capture the payment
If the capture delay is set to immediate and you comply with Klarna's Scheme Rules of shipping within 24 hours, then you can configure automatic capture when adding Klarna in your live Customer Area. Otherwise, you must manually capture Klarna payments within 90 days after authorization, even if you enable automatic capture on your merchant account. If the manual capture is not performed within 90 days, the authorization will expire.
Capture manually
To manually capture a Klarna payment, make a POST request to the /payments/{paymentPspReference}/captures endpoint.
-
When you are ready to capture the payment, make a POST /payments/{paymentPspReference}/captures request, where
{paymentPspReference}is the PSP reference from the original payment (pre-authorization) response. Specify:Parameter Required Description merchantAccountThe name of your merchant account that is used to process the payment. amount.currencyThe three-character ISO currency code. amount.valueThe amount of the transaction, in minor units.
This is the sum of the original, pre-authorized amount and all later adjustments.lineItemsPrice and product information about the purchased items, to be included on the invoice sent to the shopper. For an authorization adjustment, always specify every line item, including all captured or refunded items. See examples of Klarna-specific payment scenarios at Invoice lines and discounts.referenceA reference that you specify for this payment modification, for use in your reconciliation process. ThepspReferenceyou received in the initial authorization response remains the primary merchant reference, and this reference does not overwrite it. -
When you receive the /payments/{paymentPspReference}/captures response, note the following:
pspReference: The PSP reference associated with this/capturesrequest. This is different from the PSP reference associated with the original payment (pre-authorization) request.status: receivedreference: Your reference to this payment modification, for use in your reconciliation process.
-
Wait for the webhook event. This informs you whether the final amount has been captured.
If the capture is successful, this event contains:eventCode: CAPTUREoriginalReference: ThepspReferenceof the pre-authorization.pspReference: The PSP reference associated with this /payments/{paymentPspReference}/captures request.success: true
If the capture fails, this event contains
success: false. Review thereasonyou received in the webhook event, fix the issue, and submit the capture request again.
See examples of other Klarna-specific payment scenarios at Invoice lines and discounts.
Shipping and tracking information (optional)
You can optionally use additionalData.openinvoicedata to include shipping and tracking information. This adds information about how the products are shipped to the deliveryAddress that you specified in the /payments request. The shipping and tracking information maps to Klarna's shipping info object.
If you have the shipping and tracking information at the time of the capture, we recommend that you send it to improve the overall shopper experience. Klarna includes this information in their app, where the info is updated based on the tracking details.
- If all items are shipped with the same provider, specify the shipping and tracking information once, as shown in the capture example below.
- If one or more items in the order are shipped with different a different provider or tracking details, specify the shipping and tracking information as an array.
- You cannot specify different delivery addresses for a single order with multiple items.
| openinvoicedata | Corresponds with Klarna's
shipping_info
object |
Description | |
|---|---|---|---|
shippingCompany |
shipping_company |
The name of the shipping company, as specific as possible. Maximum 100 characters. If there are multiple shipping companies, specify an array. For example: DHL SE or [DHL SE, PostNord] | |
shippingMethod |
shipping_method |
Shipping method. Possible values:
|
|
trackingNumber |
tracking_number |
Tracking number for the shipment. Maximum 100 characters. If there are multiple tracking numbers, specify an array. For example: 050823 or [050823, 050824] | |
trackingUri |
tracking_uri |
URI where the customer can track their shipment. Maximum 1024 characters. | |
returnShippingCompany |
return_shipping_company |
The name of the shipping company for the return shipment, as specific as possible. Maximum 100 characters. For example: DHL SE | |
returnTrackingNumber |
return_tracking_number |
Tracking number for the return shipment. Maximum 100 characters. | |
returnTrackingUri |
return_tracking_uri |
URI where the customer can track their return shipment. Maximum 1024 characters. |
You will receive a /capture response containing a pspReference associated with this request. Once we have processed your request, you will also receive a CAPTURE webhook. For more information, refer to Capture.
Partial captures
To partially capture a Klarna payment, specify in your call to the /capture endpoint:
modificationAmount: The amount that the shopper should pay. This should be less than the authorised amount.additionalData.openinvoicedata: Price, product and optionally shipping and tracking information for the items that the shopper should pay for, to be included on the invoice. For the partial capture to be successful, the amounts stated inopeninvoicedataneed to be correct. You can use the same fields as listed in the manual captures section.
For more information and an example, refer to Invoice lines.
Recurring payments
To make recurring Klarna payments you need to:
Create a token
To create a token, include in your /payments request:
storePaymentMethod: true- shopperReference: Your unique identifier for the shopper.
When the payment has been settled, you receive a webhook containing:
eventCode: RECURRING_CONTRACToriginalReference: ThepspReferenceof the initial payment.pspReference: This is the token that you need to make recurring payments for this shopper.
Make sure that your server is able to receive RECURRING_CONTRACT as part of your standard webhooks. You can enable the RECURRING_CONTRACT event code in the webhook settings page.
Make a payment with a token
To make a payment with the token, include in your /payments request:
shopperReference: The unique shopper identifier that you specified when creating the token.paymentMethod.storedPaymentMethodId: ThepspReferencefrom the RECURRING_CONTRACT webhook.
You can also get this value by using the /listRecurringDetails endpoint.shopperInteraction: ContAuth-
recurringProcessingModel: The type of recurring payment that you want to make.
PossiblerecurringProcessingModelvalues:recurringProcessingModelDescription CardOnFile Online purchase where shopper is actively making a purchase using their previously stored payment details. Subscription A series of transactions with fixed or variable amounts, following a fixed time interval. This is the default value for payment requests where shopperInteraction: ContAuthUnscheduledCardOnFile Contracts that occur on a non-fixed schedule using stored payment details. For example, automatic top-ups when cardholder's balance drops below certain amount.
When making a recurring payment, you also need to provide all the parameters required for a Klarna payment request.
The following is a sample request for Klarna Pay Now, when the shopper is actively making a purchase using previously stored payment details:
Test and go live
Before accepting live payments, test your integration using the test environment and sample data provided by Klarna.
You can then check the status of Klarna test payments in your Customer Area > Transactions > Payments.
Before you go live
Make sure that:
- You have added Klarna in your live Customer Area.
- You have considered Klarna's legal and privacy information.
- You follow the Klarna guidelines on how to present Klarna in your checkout.
- The invoice lines and VAT are shown correctly on Klarna's pages.
- If a shopper gets rejected by Klarna, you offer them another payment method.
- You pass the shopper's name and address in your payment request. This is optional, but providing these parameters improves the shopper experience and increases conversion rates.
Testing in live environment
When testing Klarna payments in the live environment, make sure that you:
- Provide real shopper data. For example, your real name, personal email, personal mobile, and home and billing address. Do not provide a company address as billing address.
- Choose an item with a reasonable amount that meets Klarna's minimum requirements. For example, for Pay over time, Klarna requires a minimum amount of GBP 35. Klarna can reject a request if the product is too expensive and they do not have enough transaction history for the shopper.
- Do not do multiple tests in a short period from the same device or IP address. Otherwise, velocity rule checks are triggered, which will lead to the transaction being rejected.
If the conditions above are not met, you can receive a resultCode of Refused. The shopper sees a page with an "Option Not Available" message instead of the Klarna Payments widget. Note that these checks are bypassed in test and are only applied in the live environment.
See Klarna raw acquirer responses for the most common responses for successful, refused, failed, or cancelled transactions.