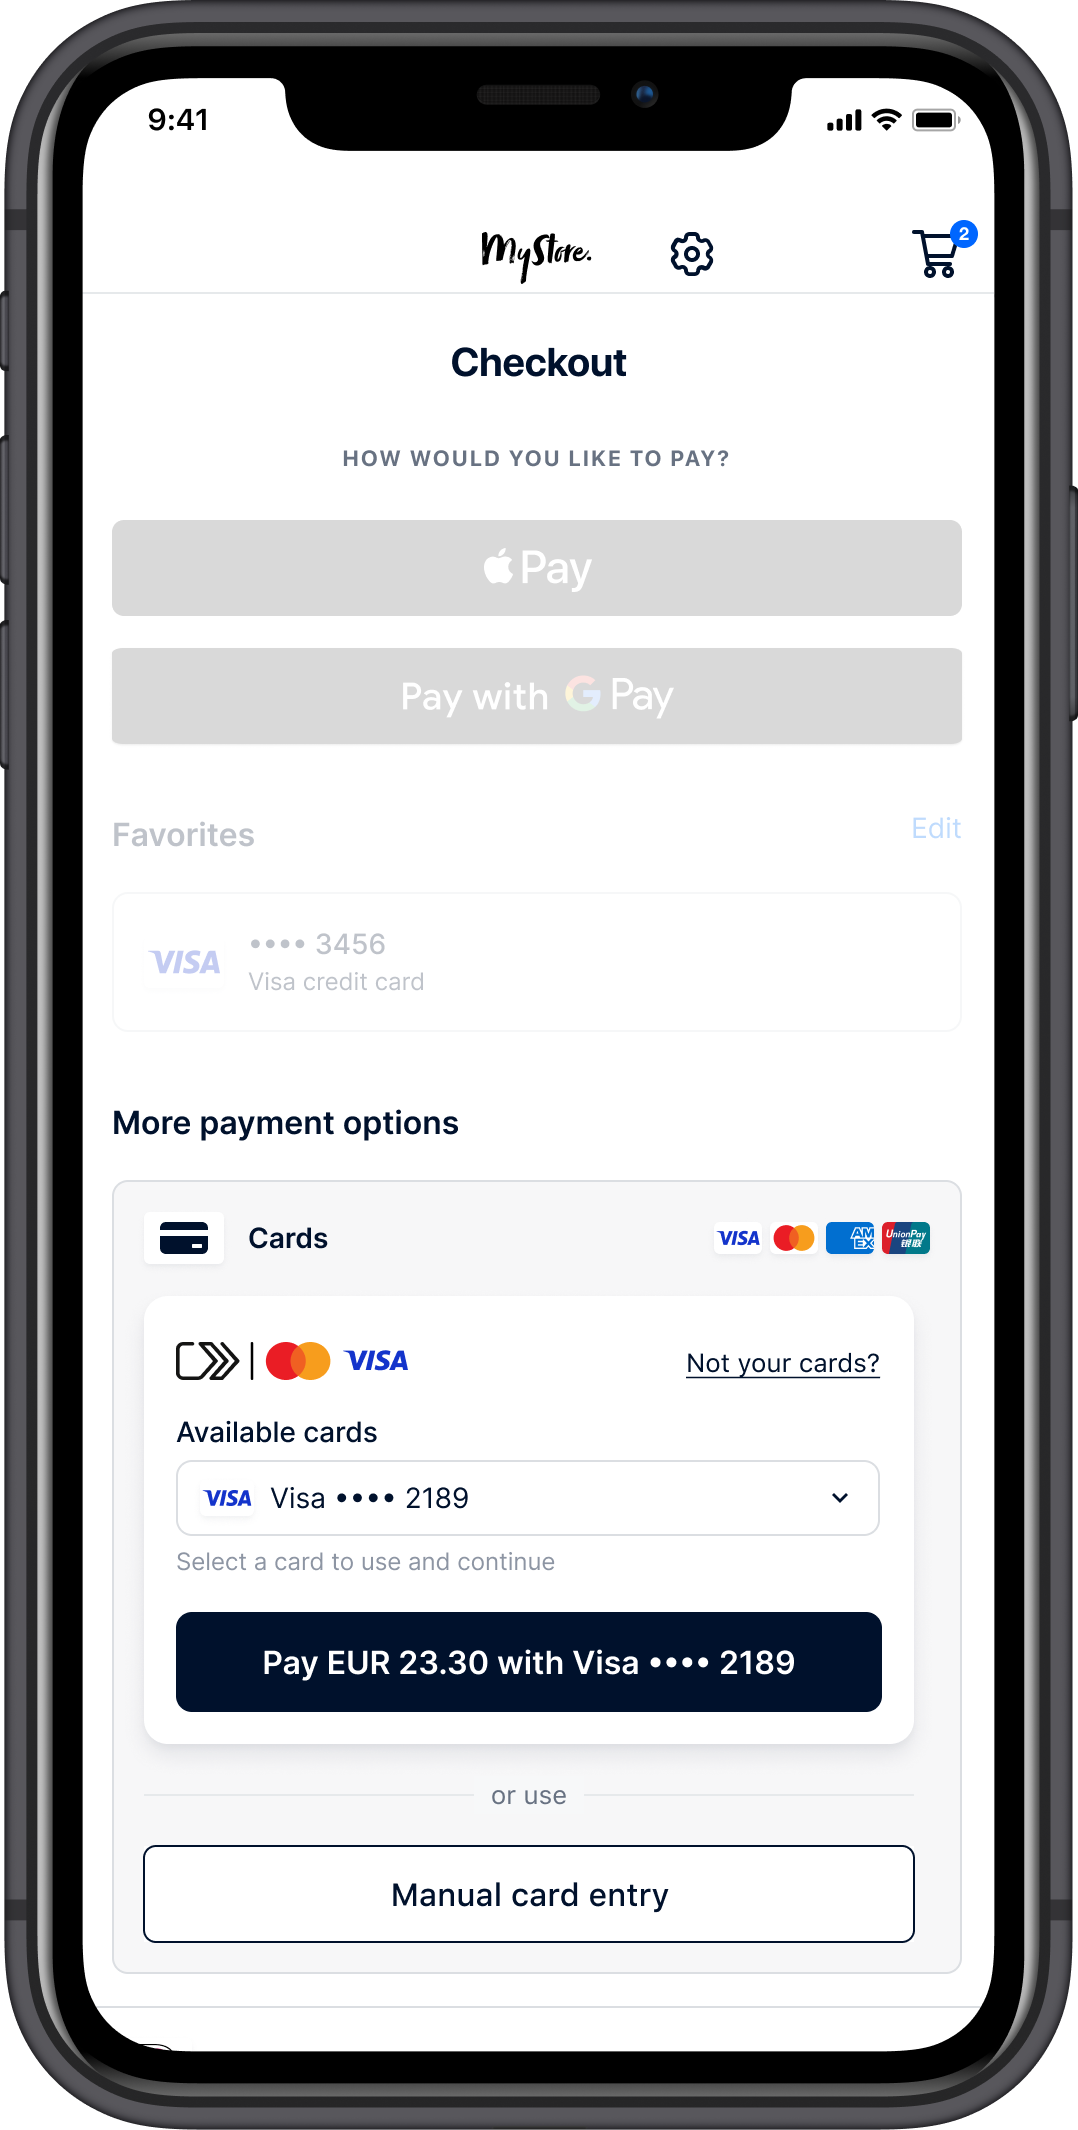
Click to Pay allows shoppers to make secure card payments without having to enter their card details.
To use Click to Pay, shoppers can create accounts with both Mastercard and Visa, or directly with their issuing bank if it is supported. The card scheme is responsible for securely storing the cardholder data and issuing tokens.
Shoppers with Click to Pay accounts are recognized during checkout and can select their preferred card details from their Click to Pay account to complete the payment.
Currently, Adyen's Click to Pay integration doesn't support recurring payments, meaning you can't offer it for subscriptions and automatic top-ups. To offer recurring payments, use our regular Card Component or Drop-in instead.
Requirements
The requirements for Click to Pay differ depending on your integration. Select the tab corresponding to your integration:
Benefits
Click to Pay offers the following benefits:
- Higher authorization rates: Increases card authorization rates through the use of Network tokens.
- Faster checkout and higher conversion: Eliminates manual card detail entry, speeding up checkout times and boosting conversion rates.
- Secure: All payments are made from a recognized device, or are authenticated through a one-time password, making them more secure than regular card payments.
- No additional fees: Payments are processed as network token card payments, meaning you don't incur additional costs.
How it works
- During checkout, we identify whether your shopper has a Click to Pay account by recognizing either their device or email address.
- If the shopper has a Click to Pay account, they can pay with their stored card details. Otherwise, the shopper can manually enter their card details.
- The shopper receives a one-time password via email or phone, and they authenticate themself.
This step is skipped if the shopper is using a recognized device. - The shopper's stored Click to Pay cards are shown.
- The shopper selects their preferred card and confirms the purchase.
Checkout example
The following image represents Adyen's implementation of Visa and Mastercard brand guidelines for a Click to Pay checkout page. We recommend you offer Click to Pay through Adyen's Web Drop-in or Component integration, as it meets card scheme requirements.
If you do not use Adyen's provided component, you must follow EMVCO customer experience guidelines to build your Click to Pay checkout component.
Step 1: Configure your integration
How you configure Click to Pay depends on your integration:
- Drop-in: Click to Pay is shown with card payments when available.
- Component: Integrate Click to Pay as part of the Card Component.
- Custom Card Component: Integrate Click to Pay as a standalone component.
Adyen does not support a custom pay button for Click to Pay. You must use the button provided by the Component.
Step 2: Recognize the Click to Pay user
Your integration recognizes an existing Click to Pay user by the cookie stored in their browser. If there is no cookie, the user will be prompted to authenticate with their email address, which will set a new cookie.
When Click to Pay recognizes the shopper, the Card Component or Drop-in shows the Click to Pay payment option.
If the shopper is using a Mastercard but there is no browser cookie, the console always returns a 400 Bad Request error. This occurs even when the payment flow continues successfully. As long as the shopper's email is registered, you can continue the payment flow.
To recognize whether a Click to Pay account is registered with your shopper's email address:
- For a /sessions request, pass the shopperEmail, id, and sessionData parameters from the
/sessionsresponse to yourAdyenCheckoutconfiguration. - For other integrations, add
shopperEmailto the card configuration.
Sample request and response
Payment request
A payment request with Click to Pay sends the same parameters as a standard cards request, plus the following parameters in the paymentMethod object:
srcDigitalCardId: The SRC reference for the Click to Pay token.srcCorrelationId: An identifier used for the Click to Pay transaction.
Click to Pay requests also include a configuration object that automatically sends the following parameters that identify your CTP accounts or storefronts with the schemes:
mcDpaIdmcSrcClientIdvisaSrcInitiatorIdvisaSrciDpaId
Payment response
When you send a payment request, the paymentMethod object contains:
- type: The value that allows you to refer to the payment method. See payment method types for more information.
- brand: The card brand that the shopper used to pay, appended with _clicktopay. Only returned if
paymentMethod.typeis scheme.
Possible values are mc_clicktopay and visa_clicktopay.
Test and go live
To test Click to Pay:
- Create a Click to Pay account:
-
Add test cards to your account:
- For Mastercard, see their Testing documentation.
-
For Visa, use any of the following cards:
Card Number CVV Expiry 4622943123114762 591 12/27 4622943123114770 050 12/27 4622943123114788 939 12/27 4622943123114796 643 12/27 4622943123114804 218 12/27 4622943123114812 950 12/27 4622943123114820 947 12/27 4622943123114838 695 12/27 4622943123114846 697 12/27 4622943123114853 322 12/27
You cannot use Adyen's test cards to test Click to Pay functionality.
See also
Because Click to Pay payments are processed as card payments, the following applies:
- Click to Pay is compatible with 3D Secure, meaning that transactions may or may not require 3D Secure authentication, based on regular 3D Secure decision-making.
- Your shoppers can issue chargebacks, which you can defend.
- You can configure your risk settings for custom risk management.
